도시바 새틀라이트 L510 SYSTEM UNIT 분해 후 내부 청소 (Toshiba After disassembling)
오래된 도시바 노트북입니다. 이제는 도시바 노트북을 구경하기가 쉽지 않습니다. 반도체에 이어서 PC사업도 철수하고 도시바 PC사업부는 샤프로 매각을 했다고 하네요. 지금 국내에 있는 도시바 노트북은 거의 구형만 남은 거 같습니다. 최소 5년 ~ 10년 연식이 된 노트북이 거의 대부분입니다. 연식이 오래된 노트북은 수리해서 재사용하기보다는 새 노트북을 구입하는 추세이다 보니 더욱 아래와 같이 오래된 모델 구경하는 게 흔하진 않아 졌습니다.
간혹, 오래된 노트북(사용하지 않는 노트북)을 창고에서 가져오셔서 아이들 학습용 (온라인 교육용)으로 재활용할 수 있냐는 문의가 들어오기는 하는데요. 메모리를 4기가로 맞추고, SSD를 장착하면, 쓸 수는 있지만 아주 느리기 때문에, 권해드리진 않습니다. 수리 및 업그레이드 비용으로 들어간 돈의 효과가 낮습니다. 개인적인 의견으로는 작업도구, 학습도구, 업무 도구는 조금 비용이 들더래도 새 제품으로 구입하는 것이 좋지 않을까는 의견을 조심스럽게 드립니다.
셀로론, 팬티엄 저가형 CPU가 장착된 저가형 노트북은 권하진 않고요. 인텔 i3, i5 (10세대, 11세대), 라이젠 3, 라이젠 5 등의 좋은 성능의 CPU가 장착된 노트북 중고가 ~100만 원 이하의 노트북을 사용하는 게 좋지 않을까 싶습니다. 삼성이나 LG 등 국내 대기업 제품보다 해외 기업 제품(레노버, HP 등)이 특가로 저렴하게 나오는 경우가 많습니다.
아래는 도시바 새틀라이트 L510 (상세 모델명 : PSLGWK-006005)의 분해 과정을 사진으로 남겨놨습니다.
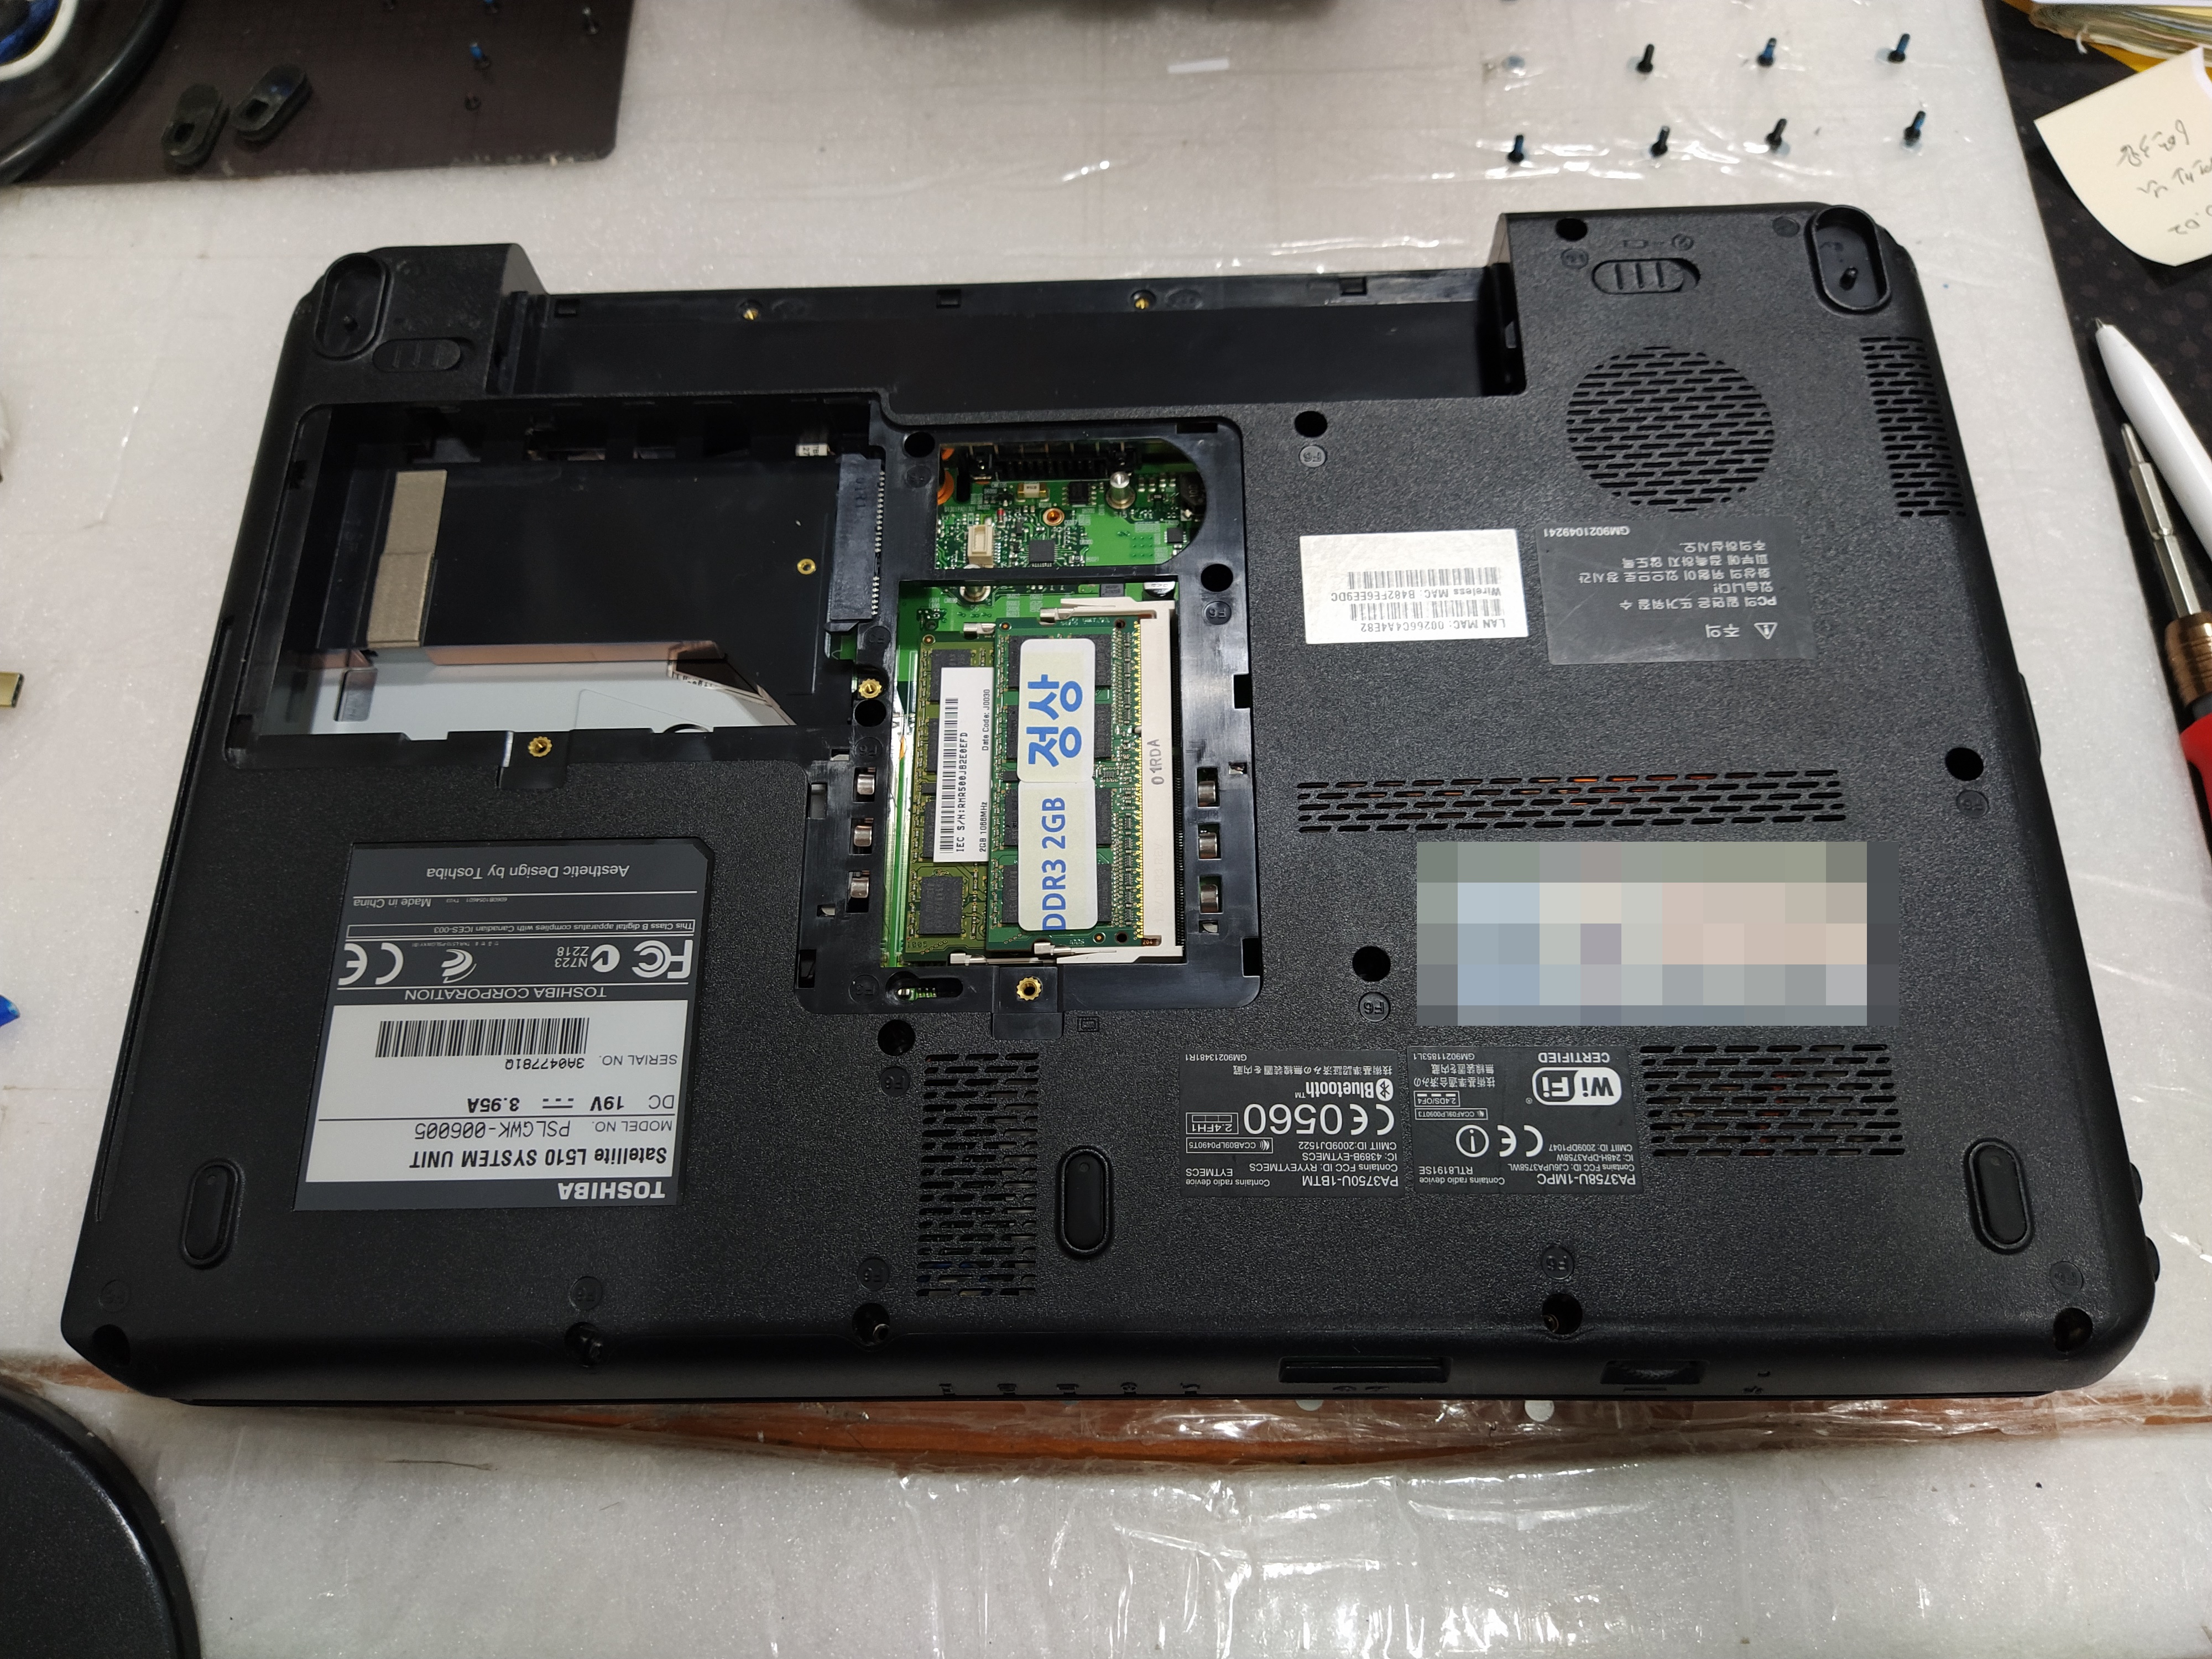
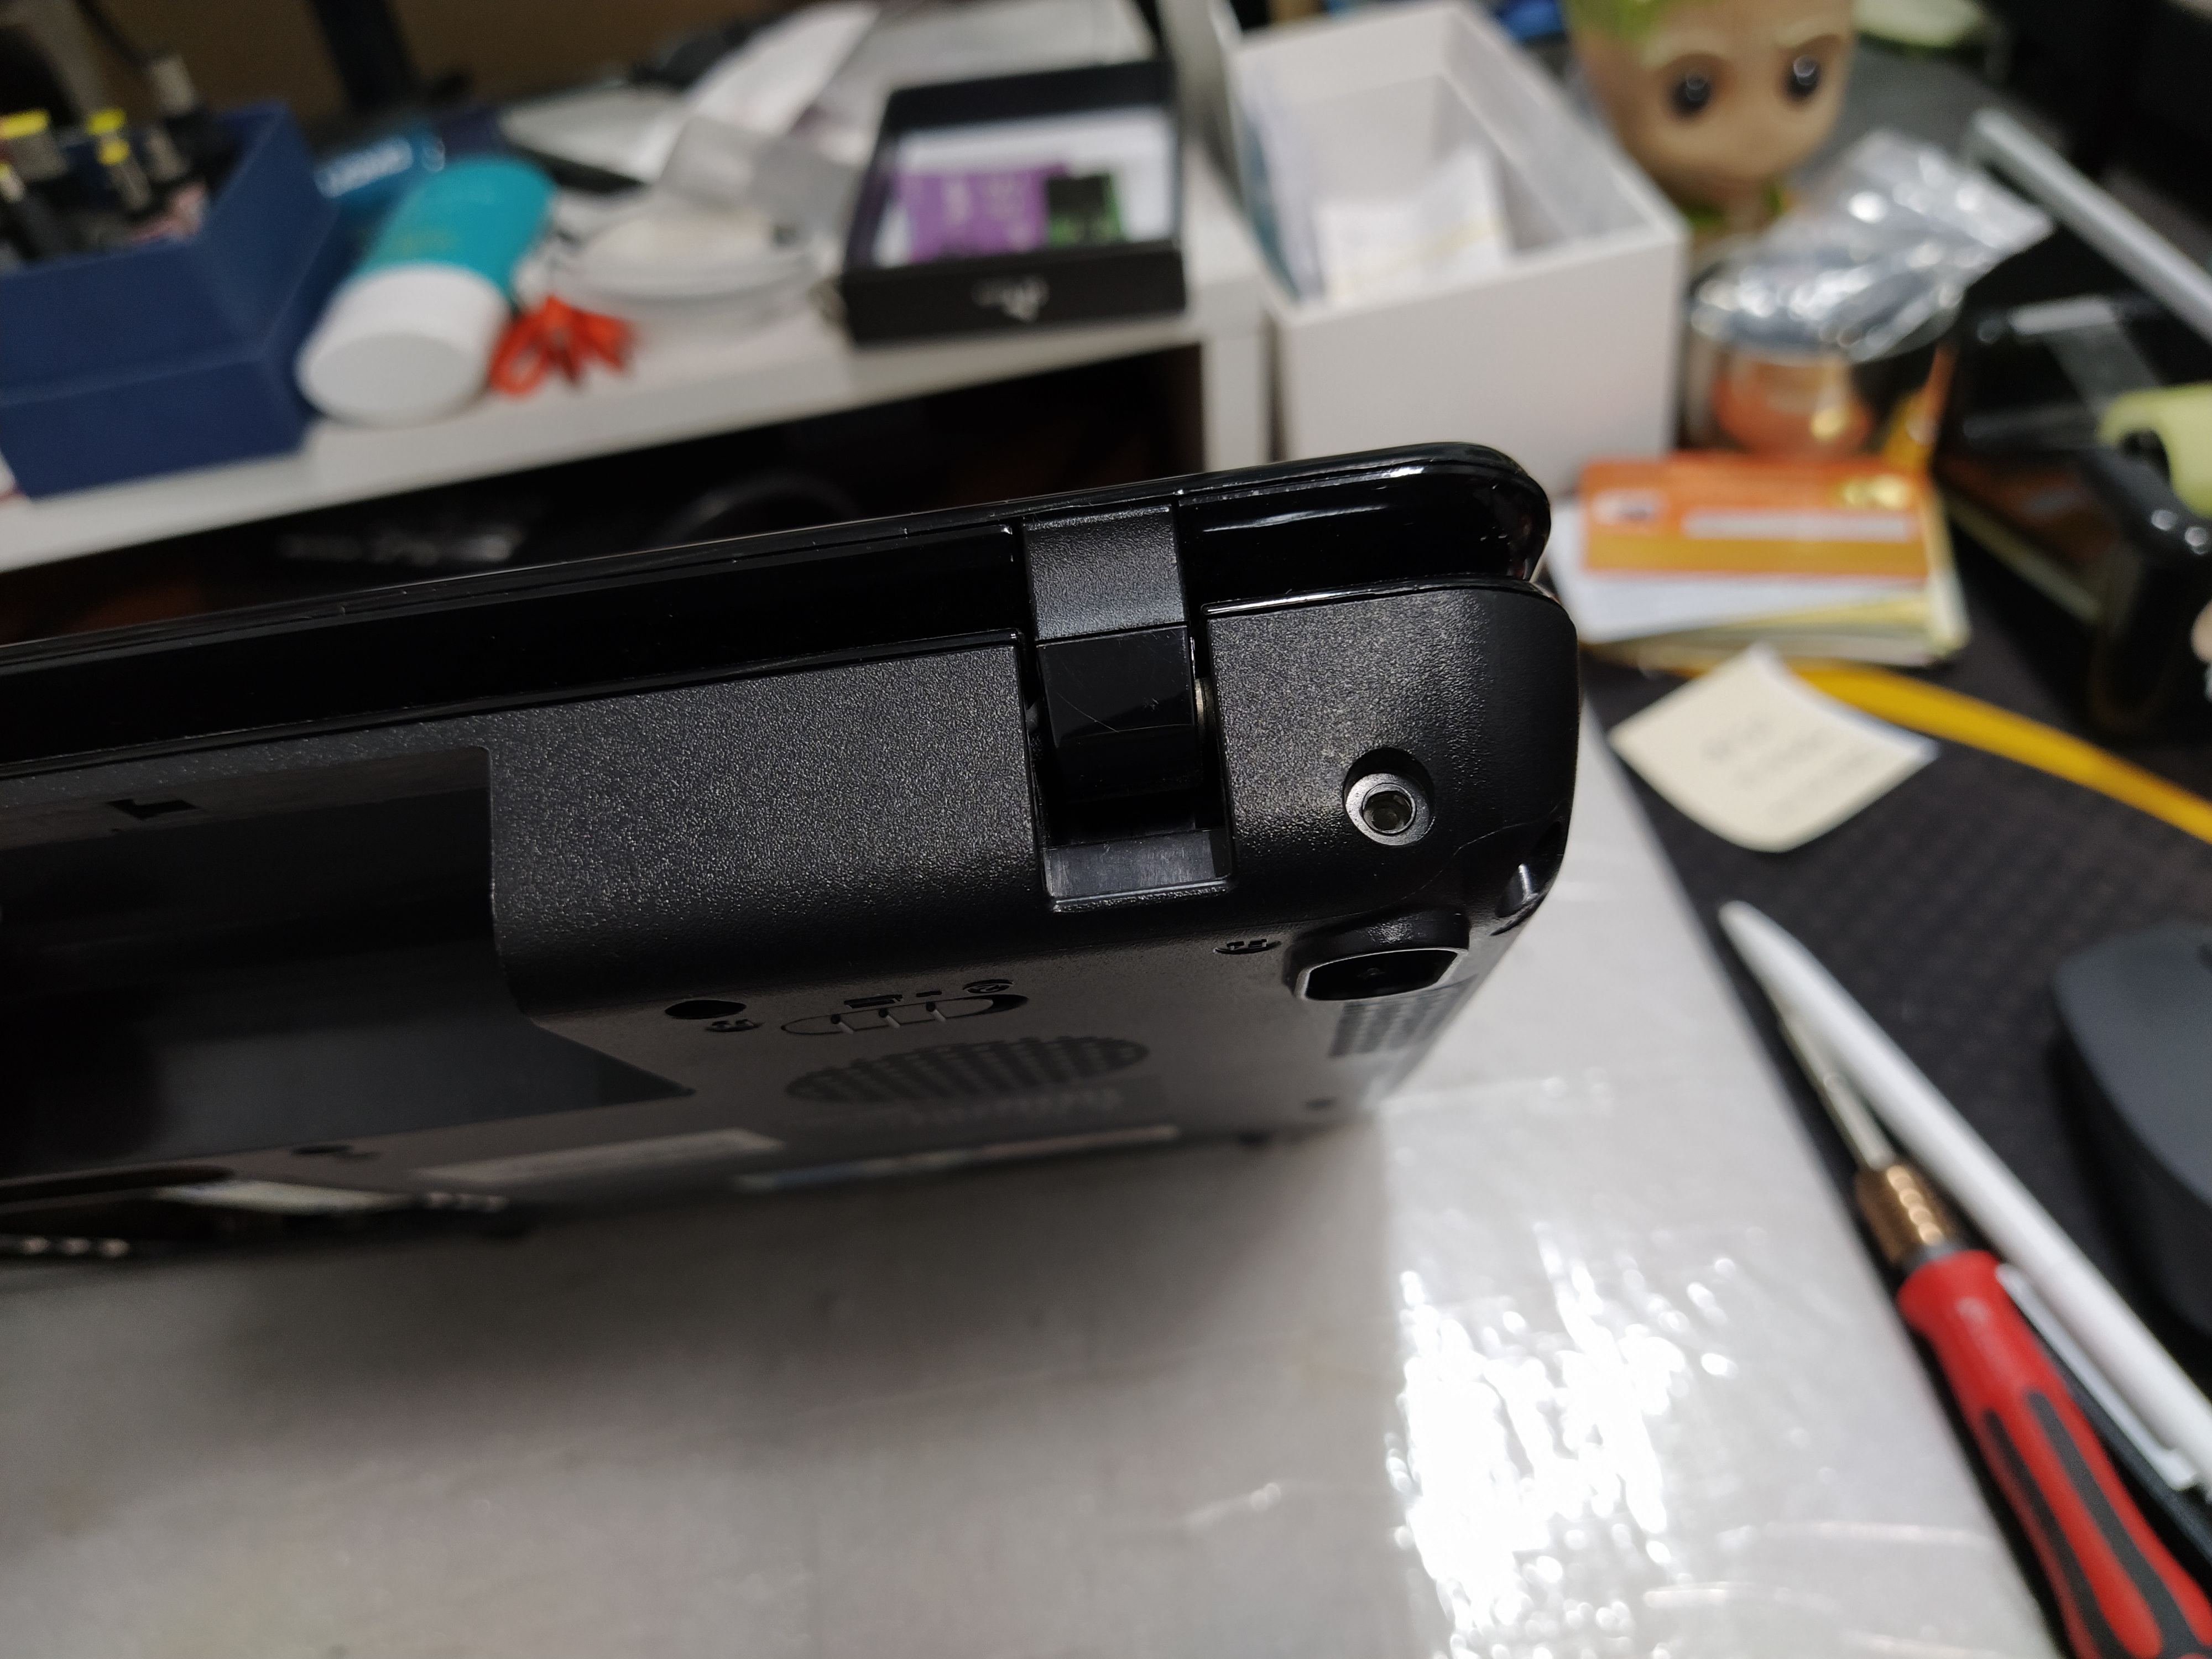
간혹 구형 모델의 노트북은 노트북 미끄럼(충격) 방지패드에 나사를 숨겨두는 모델도 있는데요. 이 모델은 숨겨진 나사는 없었습니다. 다만, 특이하게 노트북 힌지 뒤편에 나사가 조여진 특이한 모델이네요. 아래 사진 참조, 노트북 뒤편의 나사도 풀어야 분해가 가능한 모델입니다. (주의) => 키보드를 분해하고 숨겨진 나사를 제거해야 완전 분해가 됩니다. 키보드 분해하는 방법은 아래의 사진에서 이어집니다.
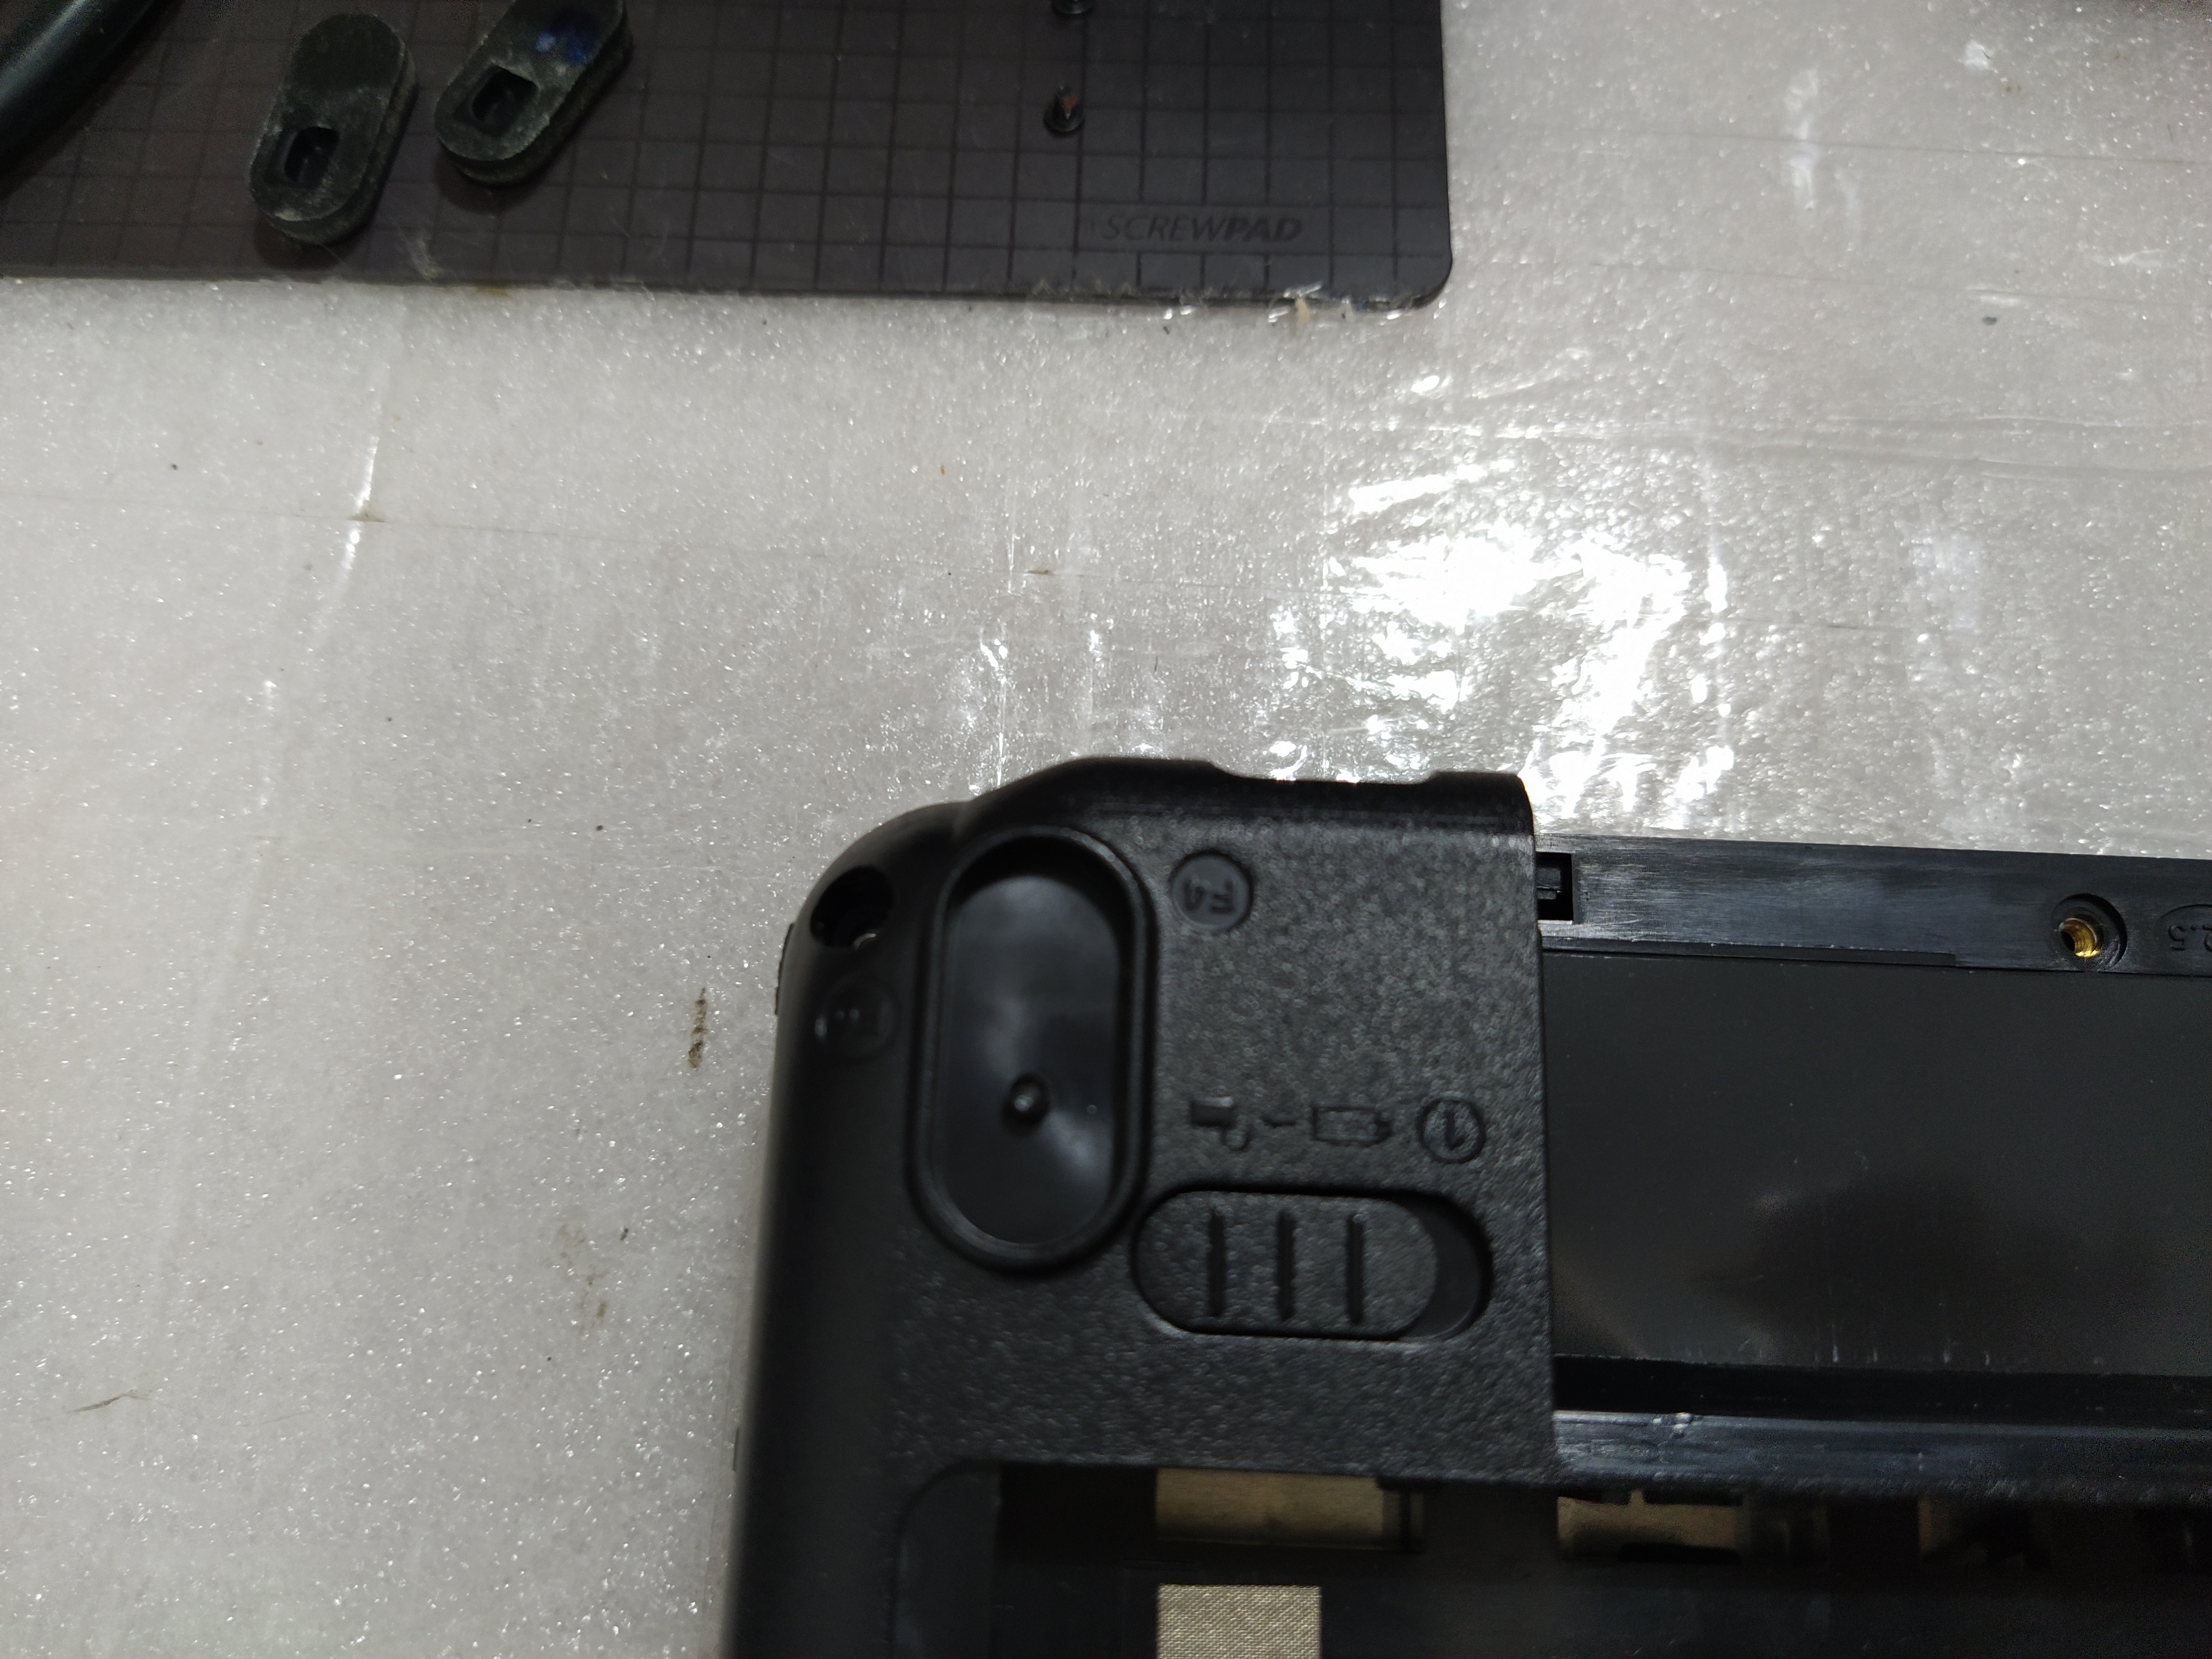
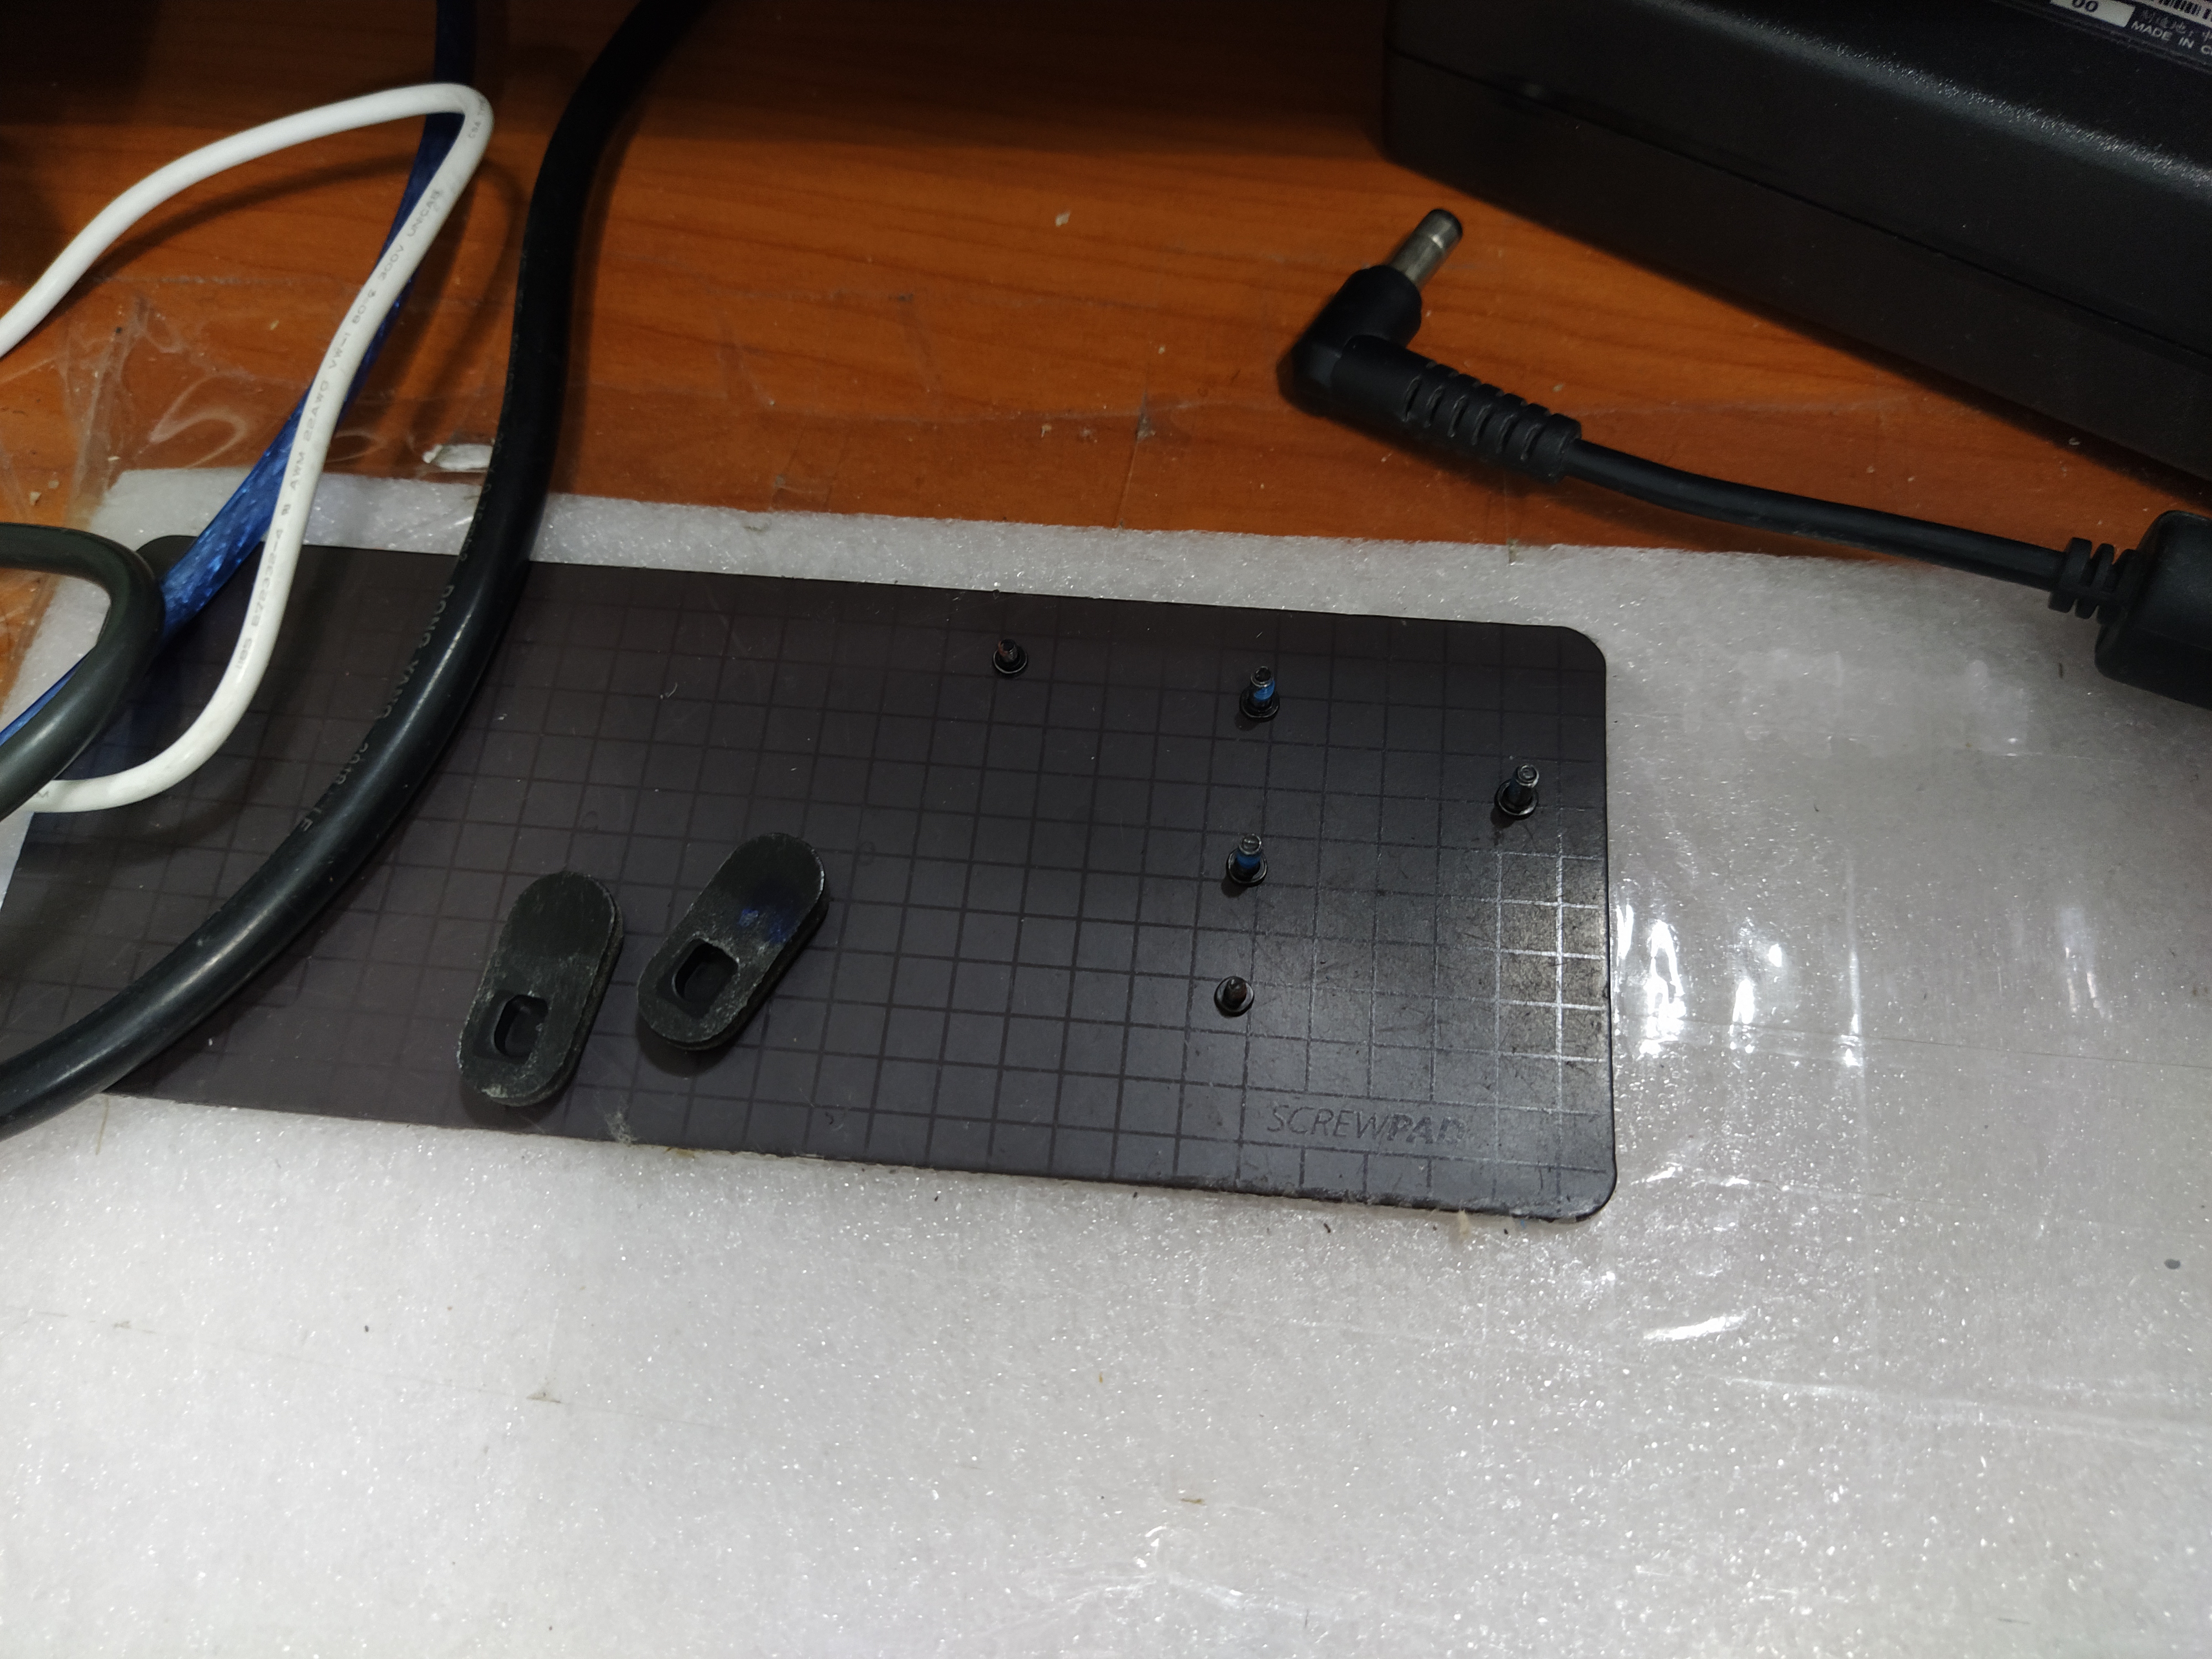
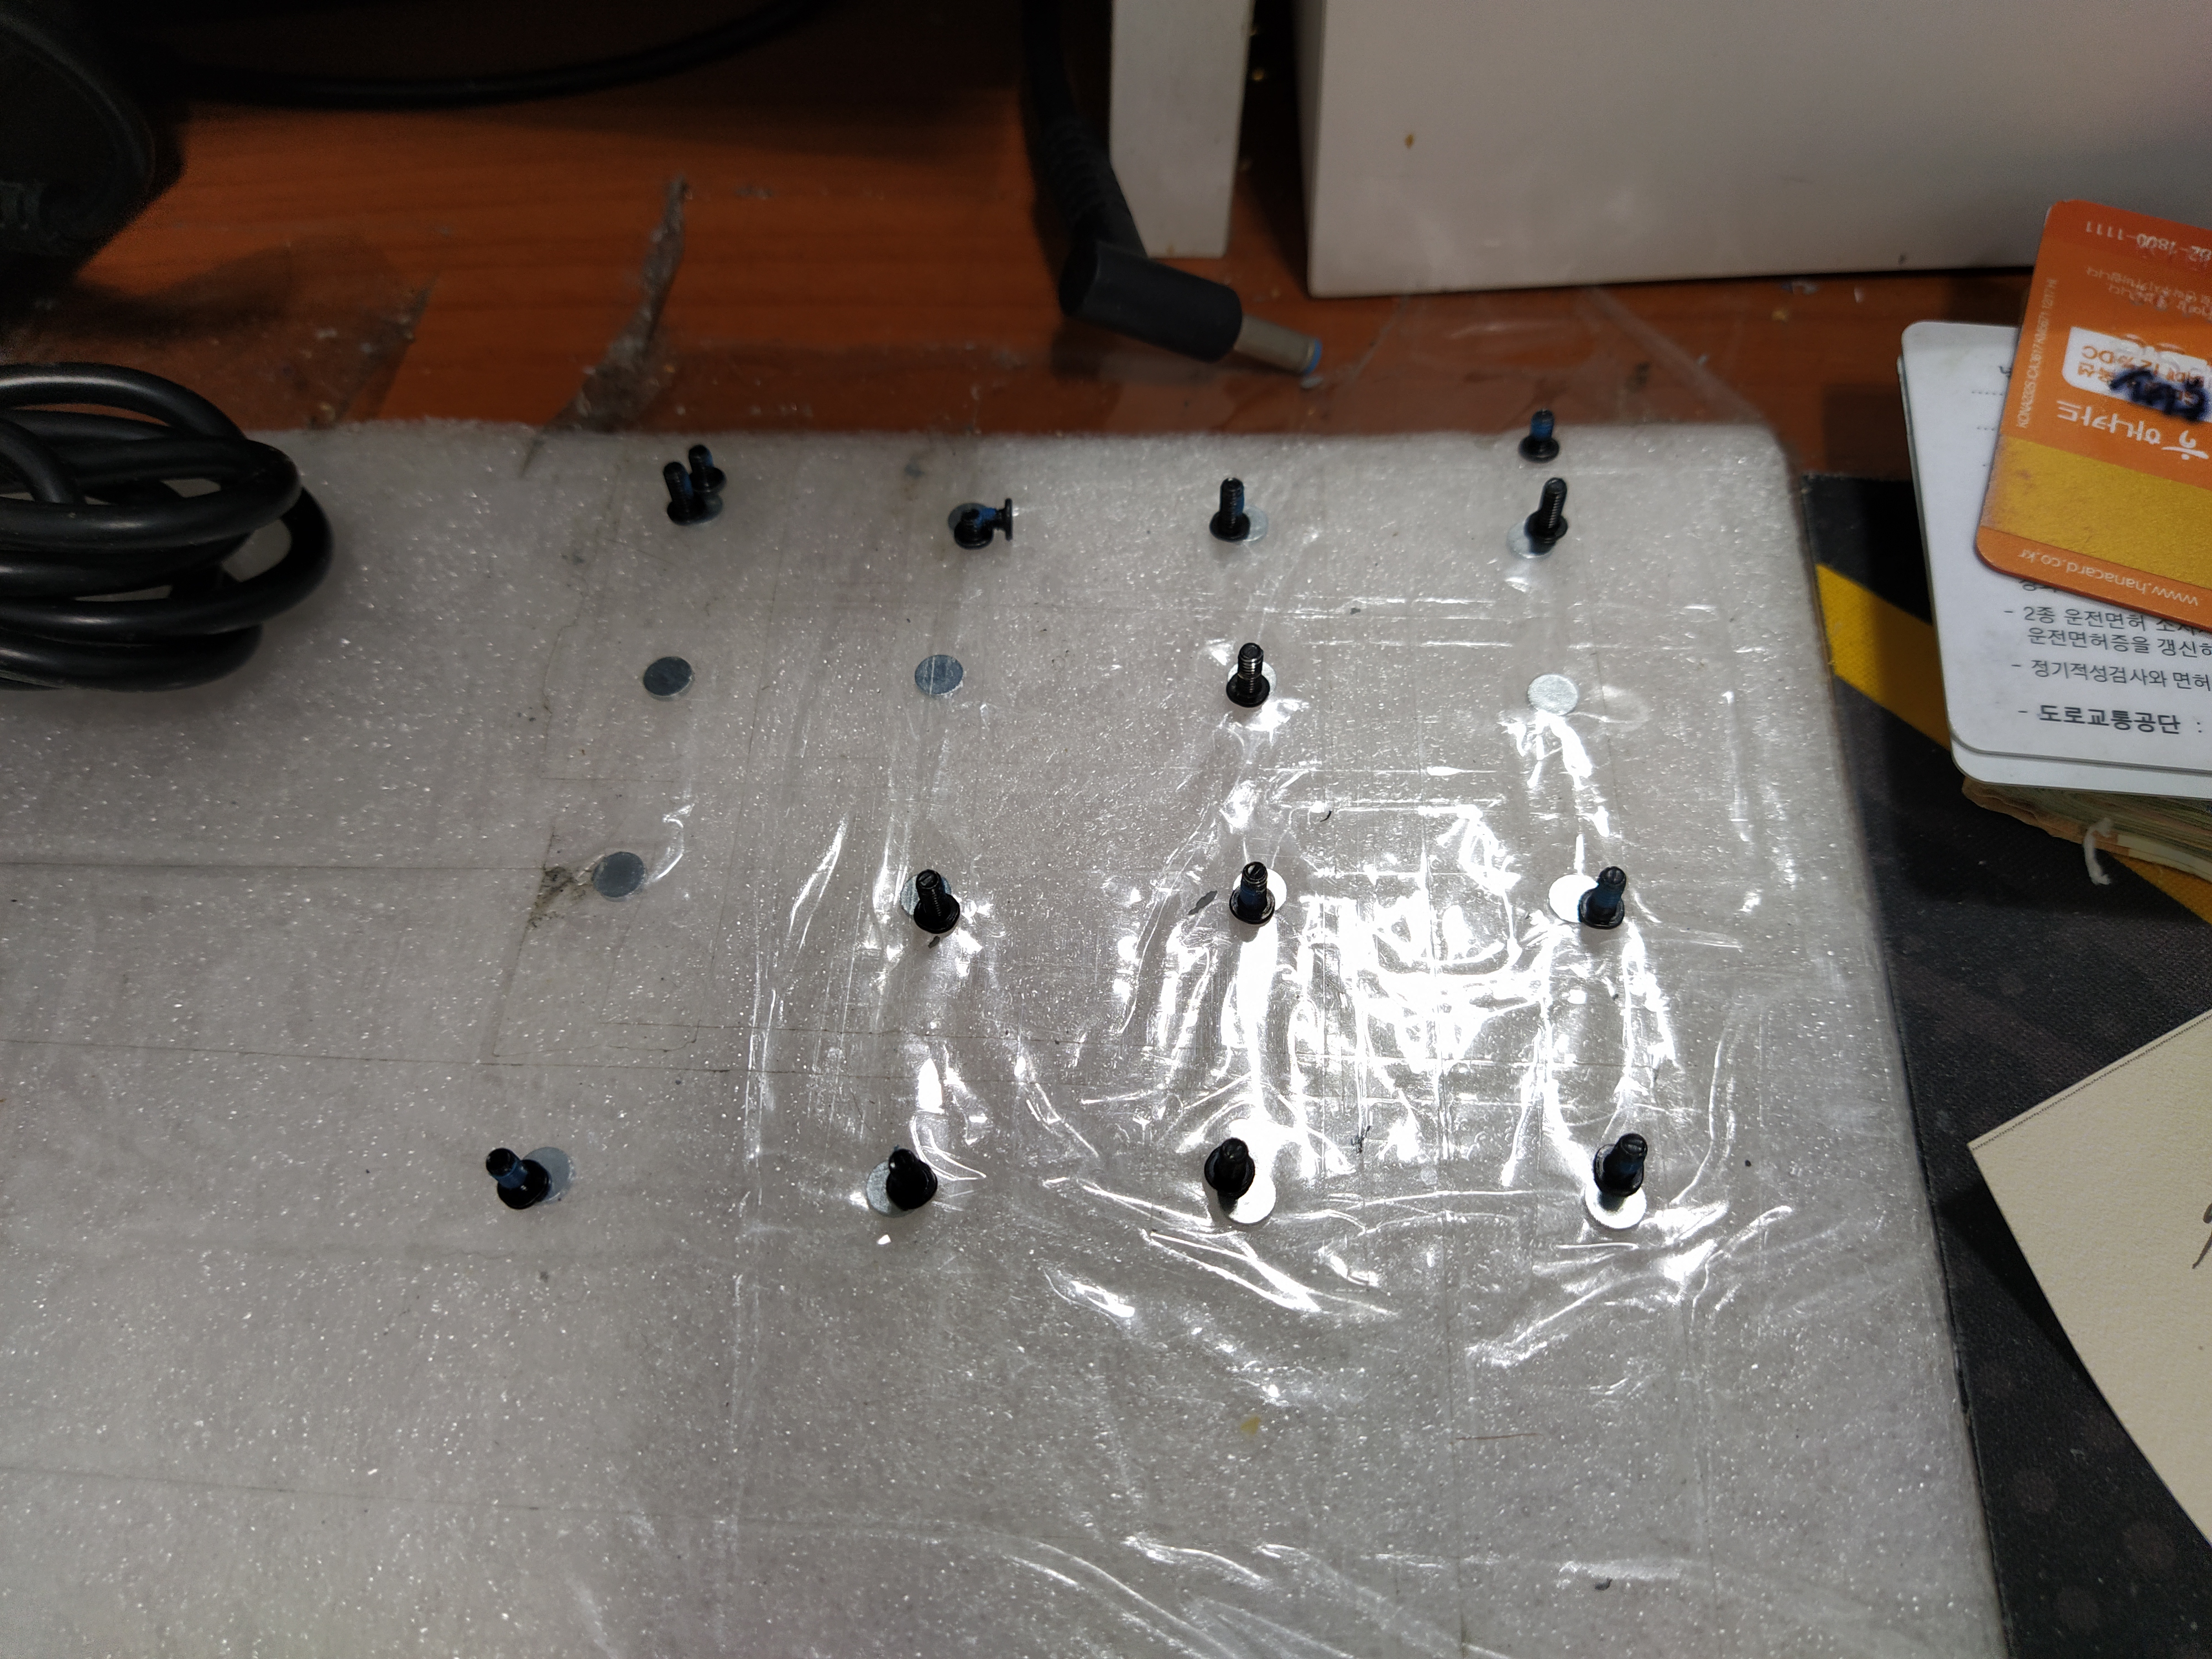
뒷면의 나사를 제거하고 한 곳에 잘 모아뒀습니다. 노트북의 나사 위치와 유사하게 분류해서 모아뒀으니 참고 바랍니다. 나사의 굵기, 길이도 제각각이라서 위치를 잘 파악해서 보관해야 잘못 체결하지 않습니다.
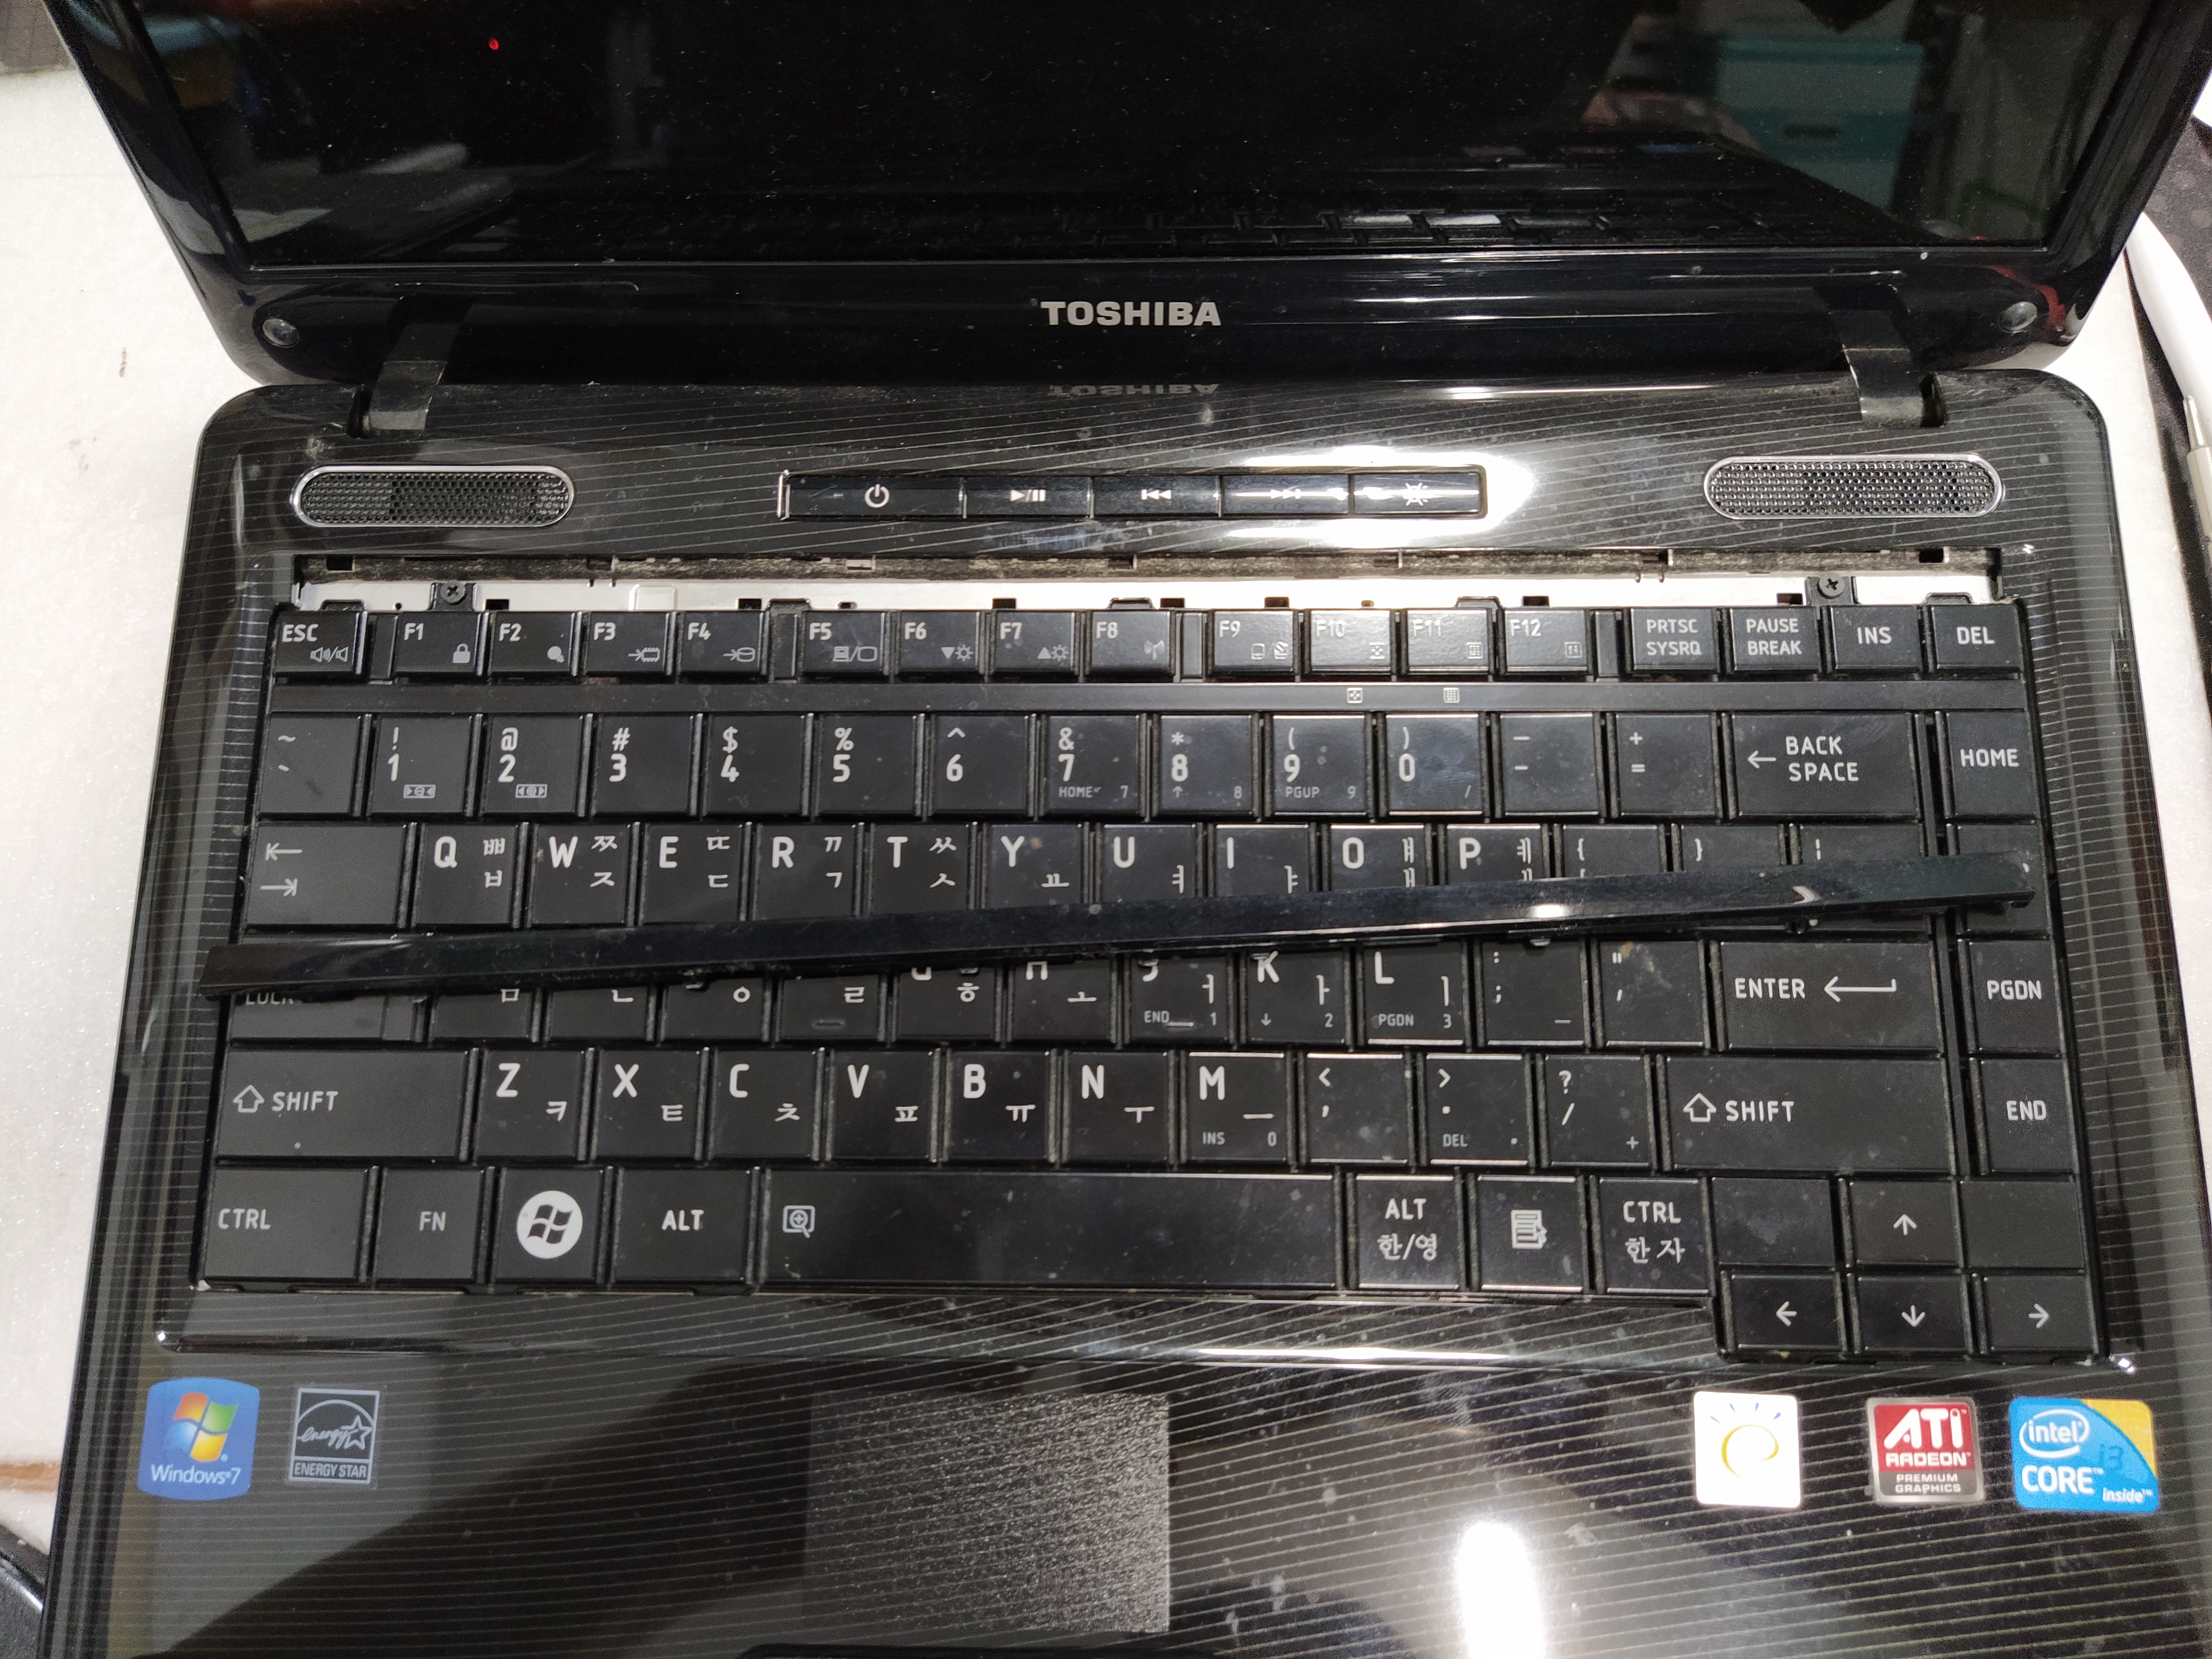
오래된 노트북은 숨겨진 나사가 대부분 있습니다. 이 나사를 풀지 않으면 커버를 벗겨낼 수 없기 때문에, 커버가 잘 안 벗겨진다면, 숨겨진 나사가 있을 수 있으니, 힘으로 벗겨내지 마시고 숨겨진 나사를 풀어주시면 됩니다. 아래와 같이 노트북의 키보드를 제거하면, 숨겨진 나사를 찾아볼 수 있습니다. 키보드의 나사를 제거하기 위해서는 키보드 나사 위 커버를 먼저 제거합니다. (일자 드라이버나 머리가 평평한 철판 헤라를 사용해서 제치면 커버를 제거하고 키보드를 해체할 수 있습니다.)
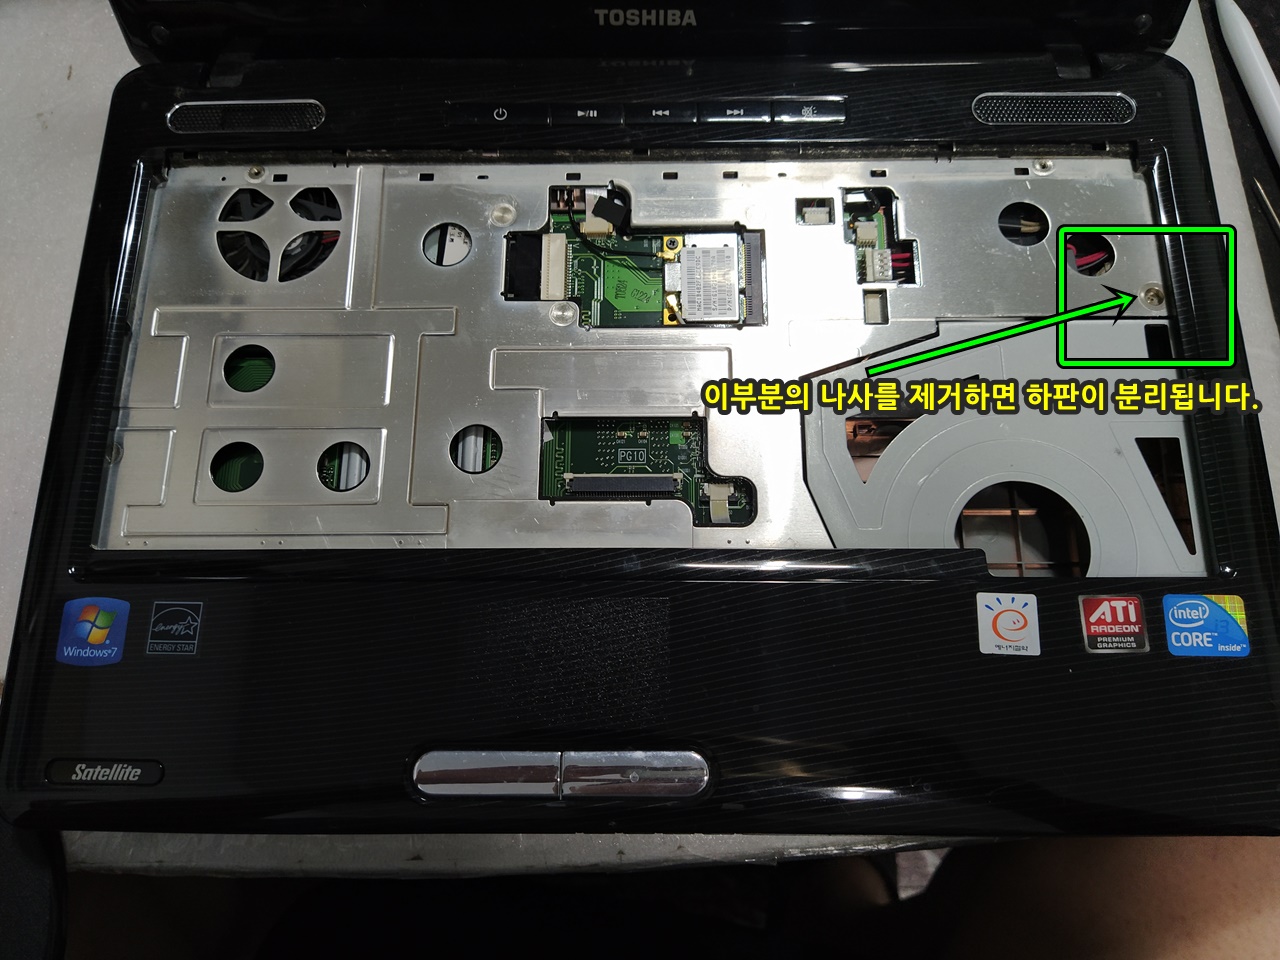
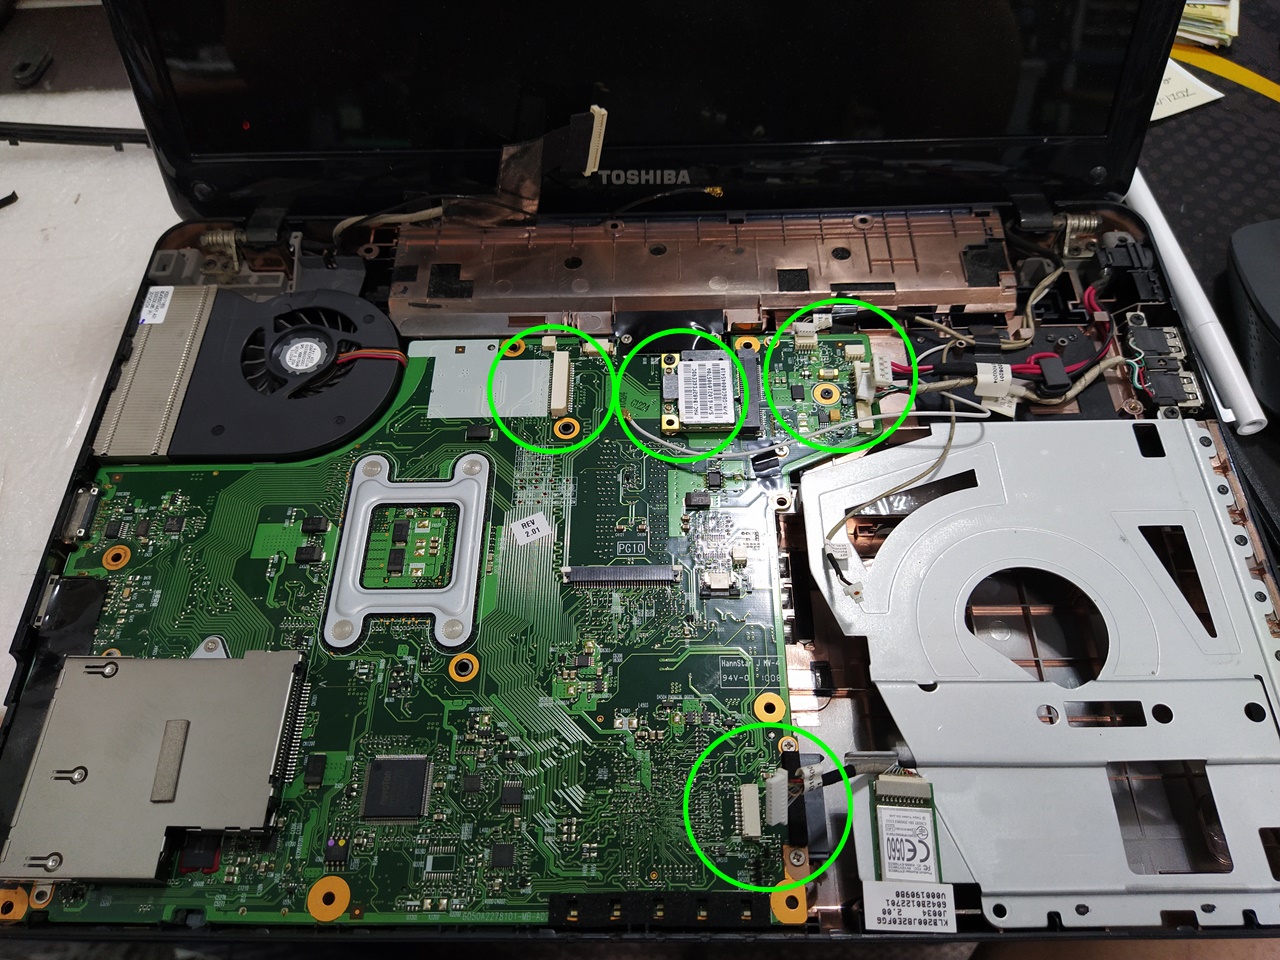
아래와 같이 키보드 밑에 숨겨진 나사를 찾았습니다. 이 나사를 풀어야 하판과 키보드판이 분리가 됩니다. 또한, 보시는 것처럼, 각종 커넥터가 굉장히 많이 연결된 노트북이기 때문에 이 커넥터도 모두 풀어줘야 분해가 가능합니다. 미리 사진을 찍어두시고 작업을 진행하는 게 좋을 거 같습니다.
나중에 깜빡하면, 다시 분해해서 연결해야 하는 불상사가 생길 수 있습니다. 연결 안 한다고 고장 나지는 않겠지만 상당히 귀찮은 작업이기 때문에 미리 확인용 사진을 남겨놓는 게 좋습니다. 처음 분해하는 것이라면, 연습장에 기록을 남겨놓는 것도 노트북 분해 연습이 될 수 있습니다. 요즘은 이렇게 커넥터가 많은 모델은 잘 없습니다. HP 노트북 중 일부 분해하기 까탈스러운 모델이 있기는 합니다.
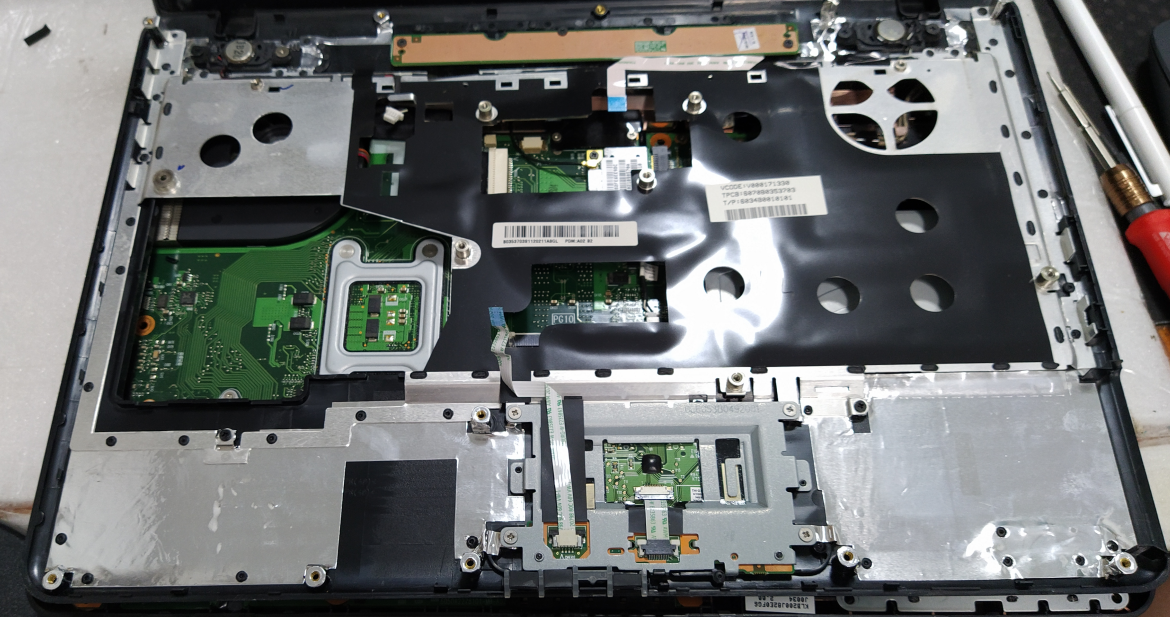
자판 커넥터 제거, 마우스 터치패드 커넥터 제거, 키보드 위의 특수키 커넥터 제거하면, 아래와 같이 키보드 상판이 분리가 됩니다.
CPU 서멀구리스 재도포작업을 위해서 메인보드를 하판에서 분리를 해야 합니다. 아래와 같이 많은 커넥터를 제거한 다음에 분해를 해야 하기 때문에, 미리 기록을 해놓고 분해하면, 재조립이 수월해집니다. (저도 분해하고 바로 게시글을 쓰는 게 아니라 사진만 보고 다시 글을 작성하는 것이기 때문에, 모든 내용이 기억나진 않고요. 사진에 보이는 대로 육안상 설명을 드리는 것이라서 실제로 뜯을 때, 분해했던 커넥터의 위치를 잘 기억하고 계시는 게 중요합니다. 분해하시는 분도 집중해서 분해하시길 바랍니다.)

메인보드를 하판과 완전 분해하기 위해서 하판과 체결된 나사를 풀어야 하는데요. 나사가 많이 체결된 상태는 아녔습니다. 2군데 정도 나사를 풀었던 기억이 납니다. CPU팬 위쪽에 나사가 하나 있고요. 메인보드에 나사가 하나 체결된 상태였던 거 같습니다. 실제로 분해하는 사람이 메인보드를 살짝 손가락으로 들어보시면, 걸리는 부분이 생깁니다. 그 부분에 나사나 걸리는 부분이 있다고 보시면 됩니다. (아래 사진 참조, 손가락으로 보드를 들어 올릴 때, 살짝살짝! 걸리는 부분 확인한다는 느낌으로 들어 올리고 안 올라오는데 무리하게 지렛대로 들어 올리면 부러질 수도 있습니다.)

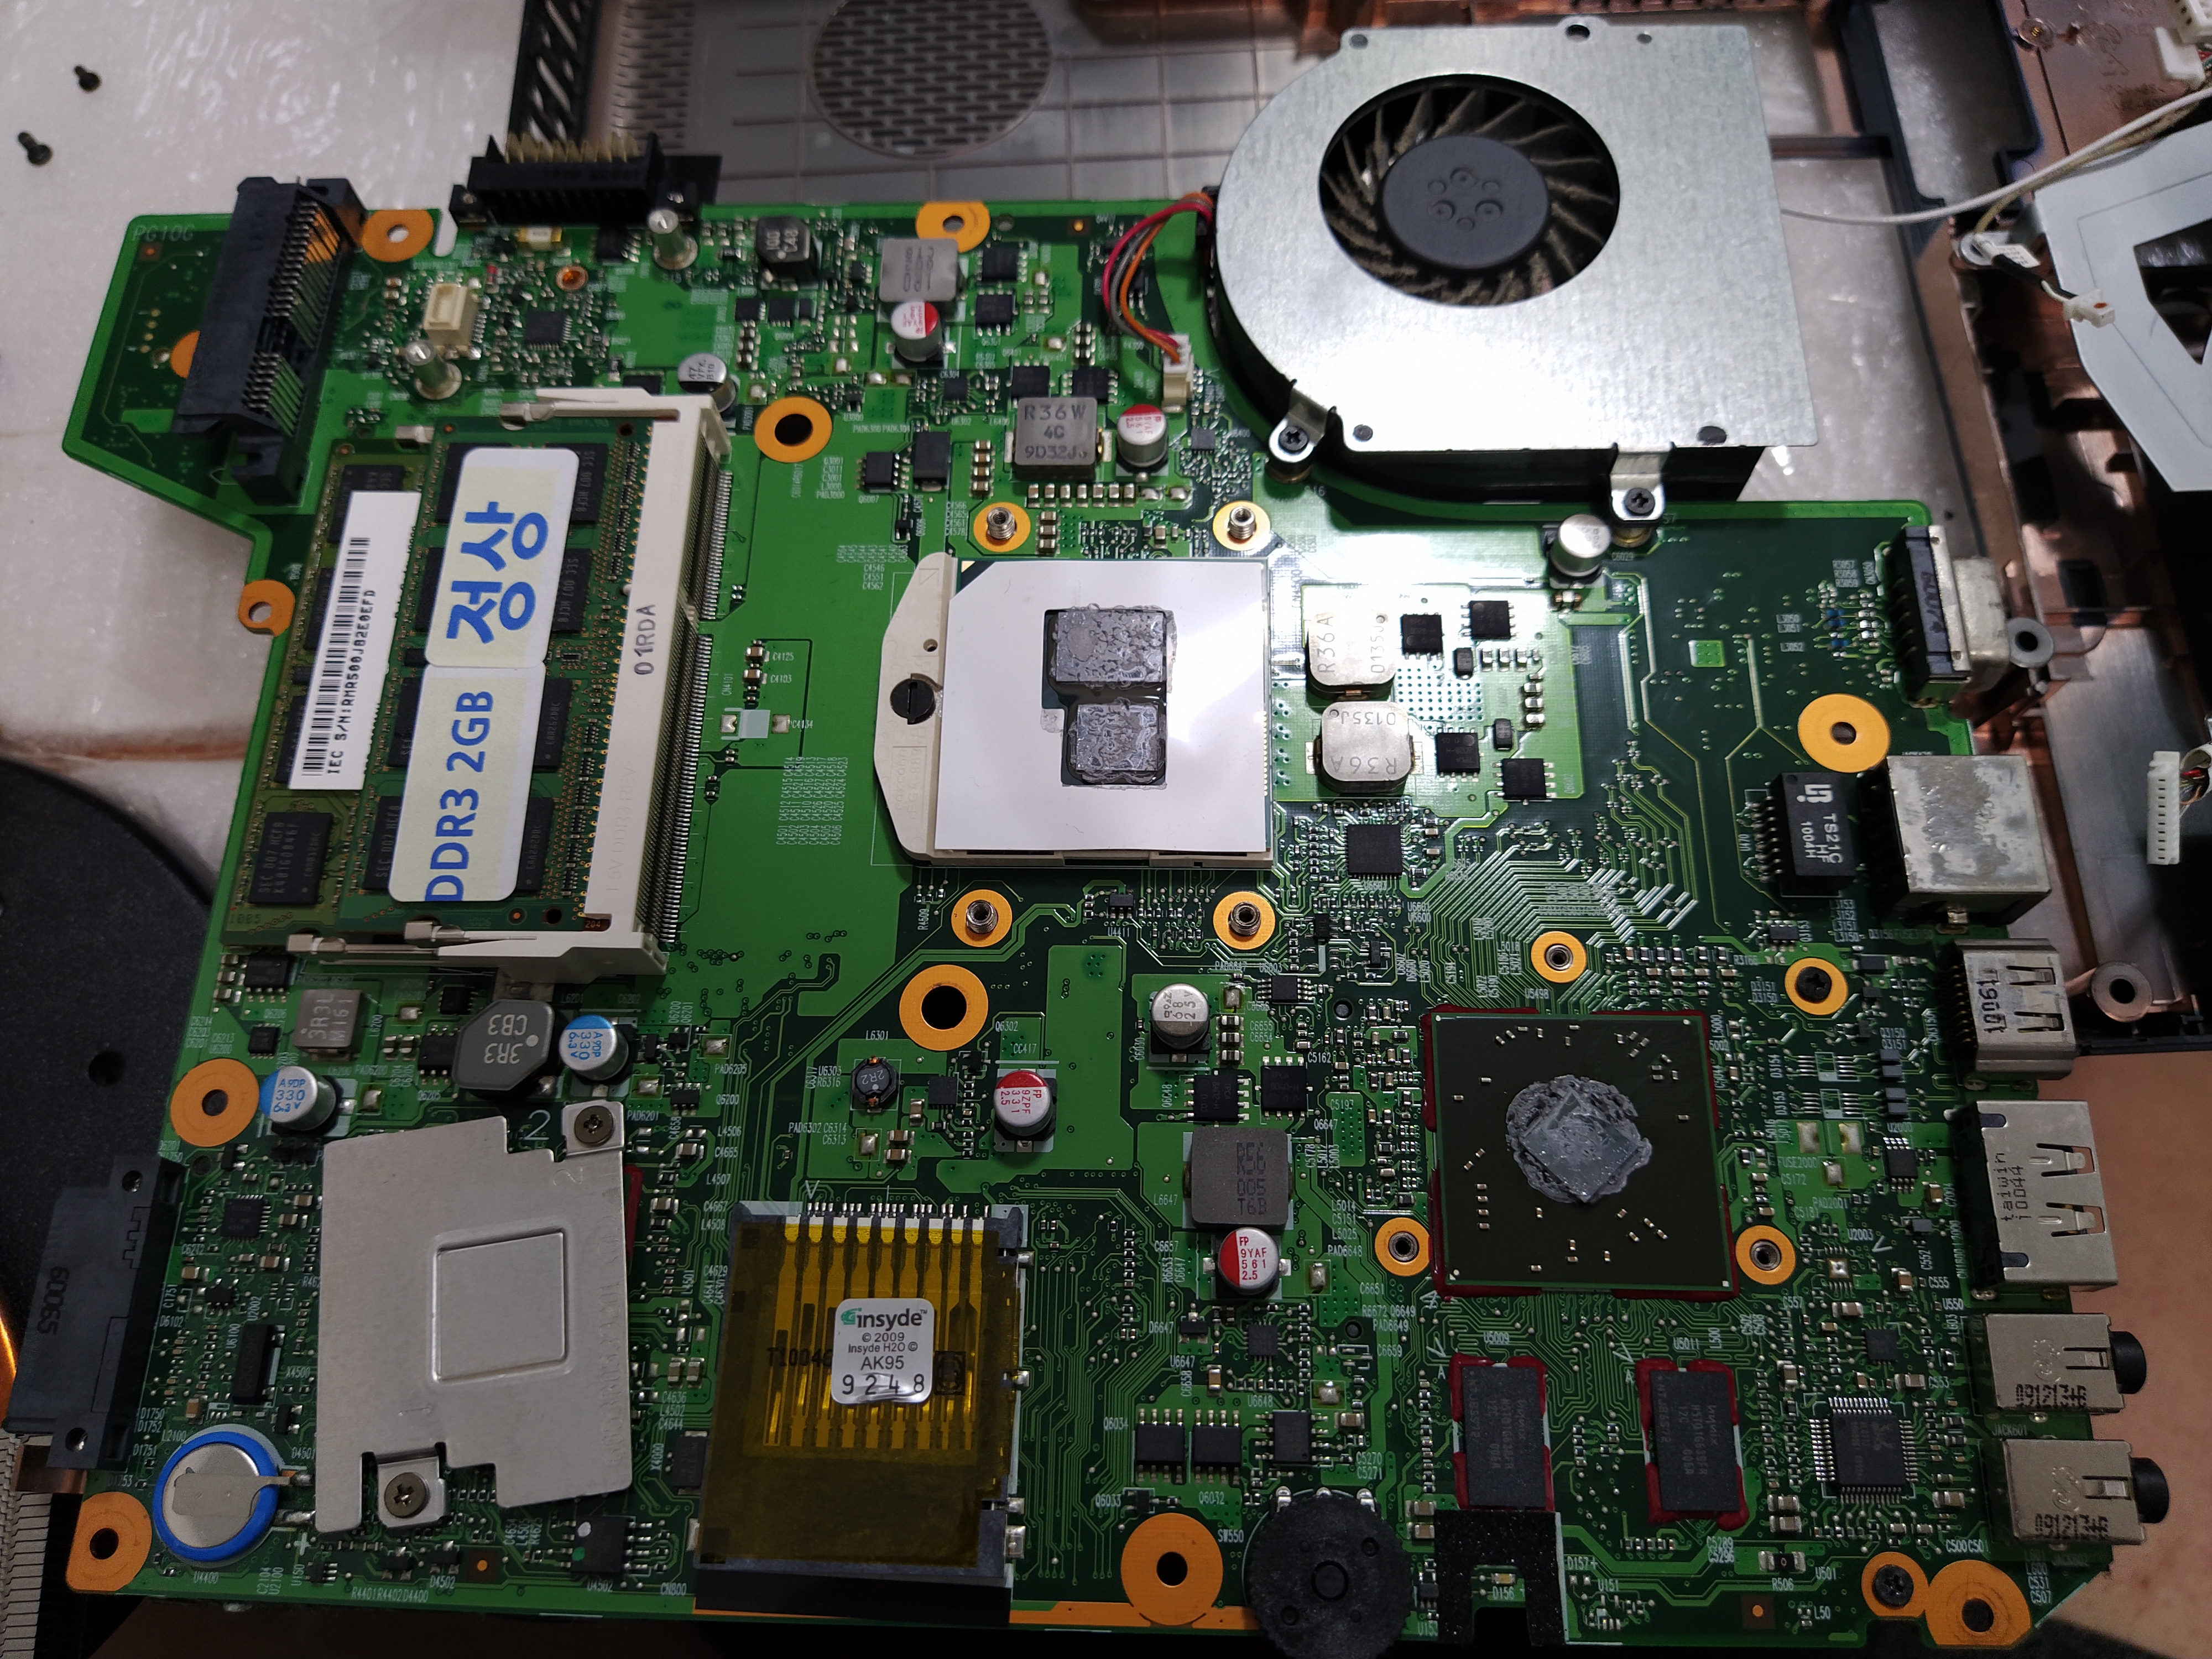
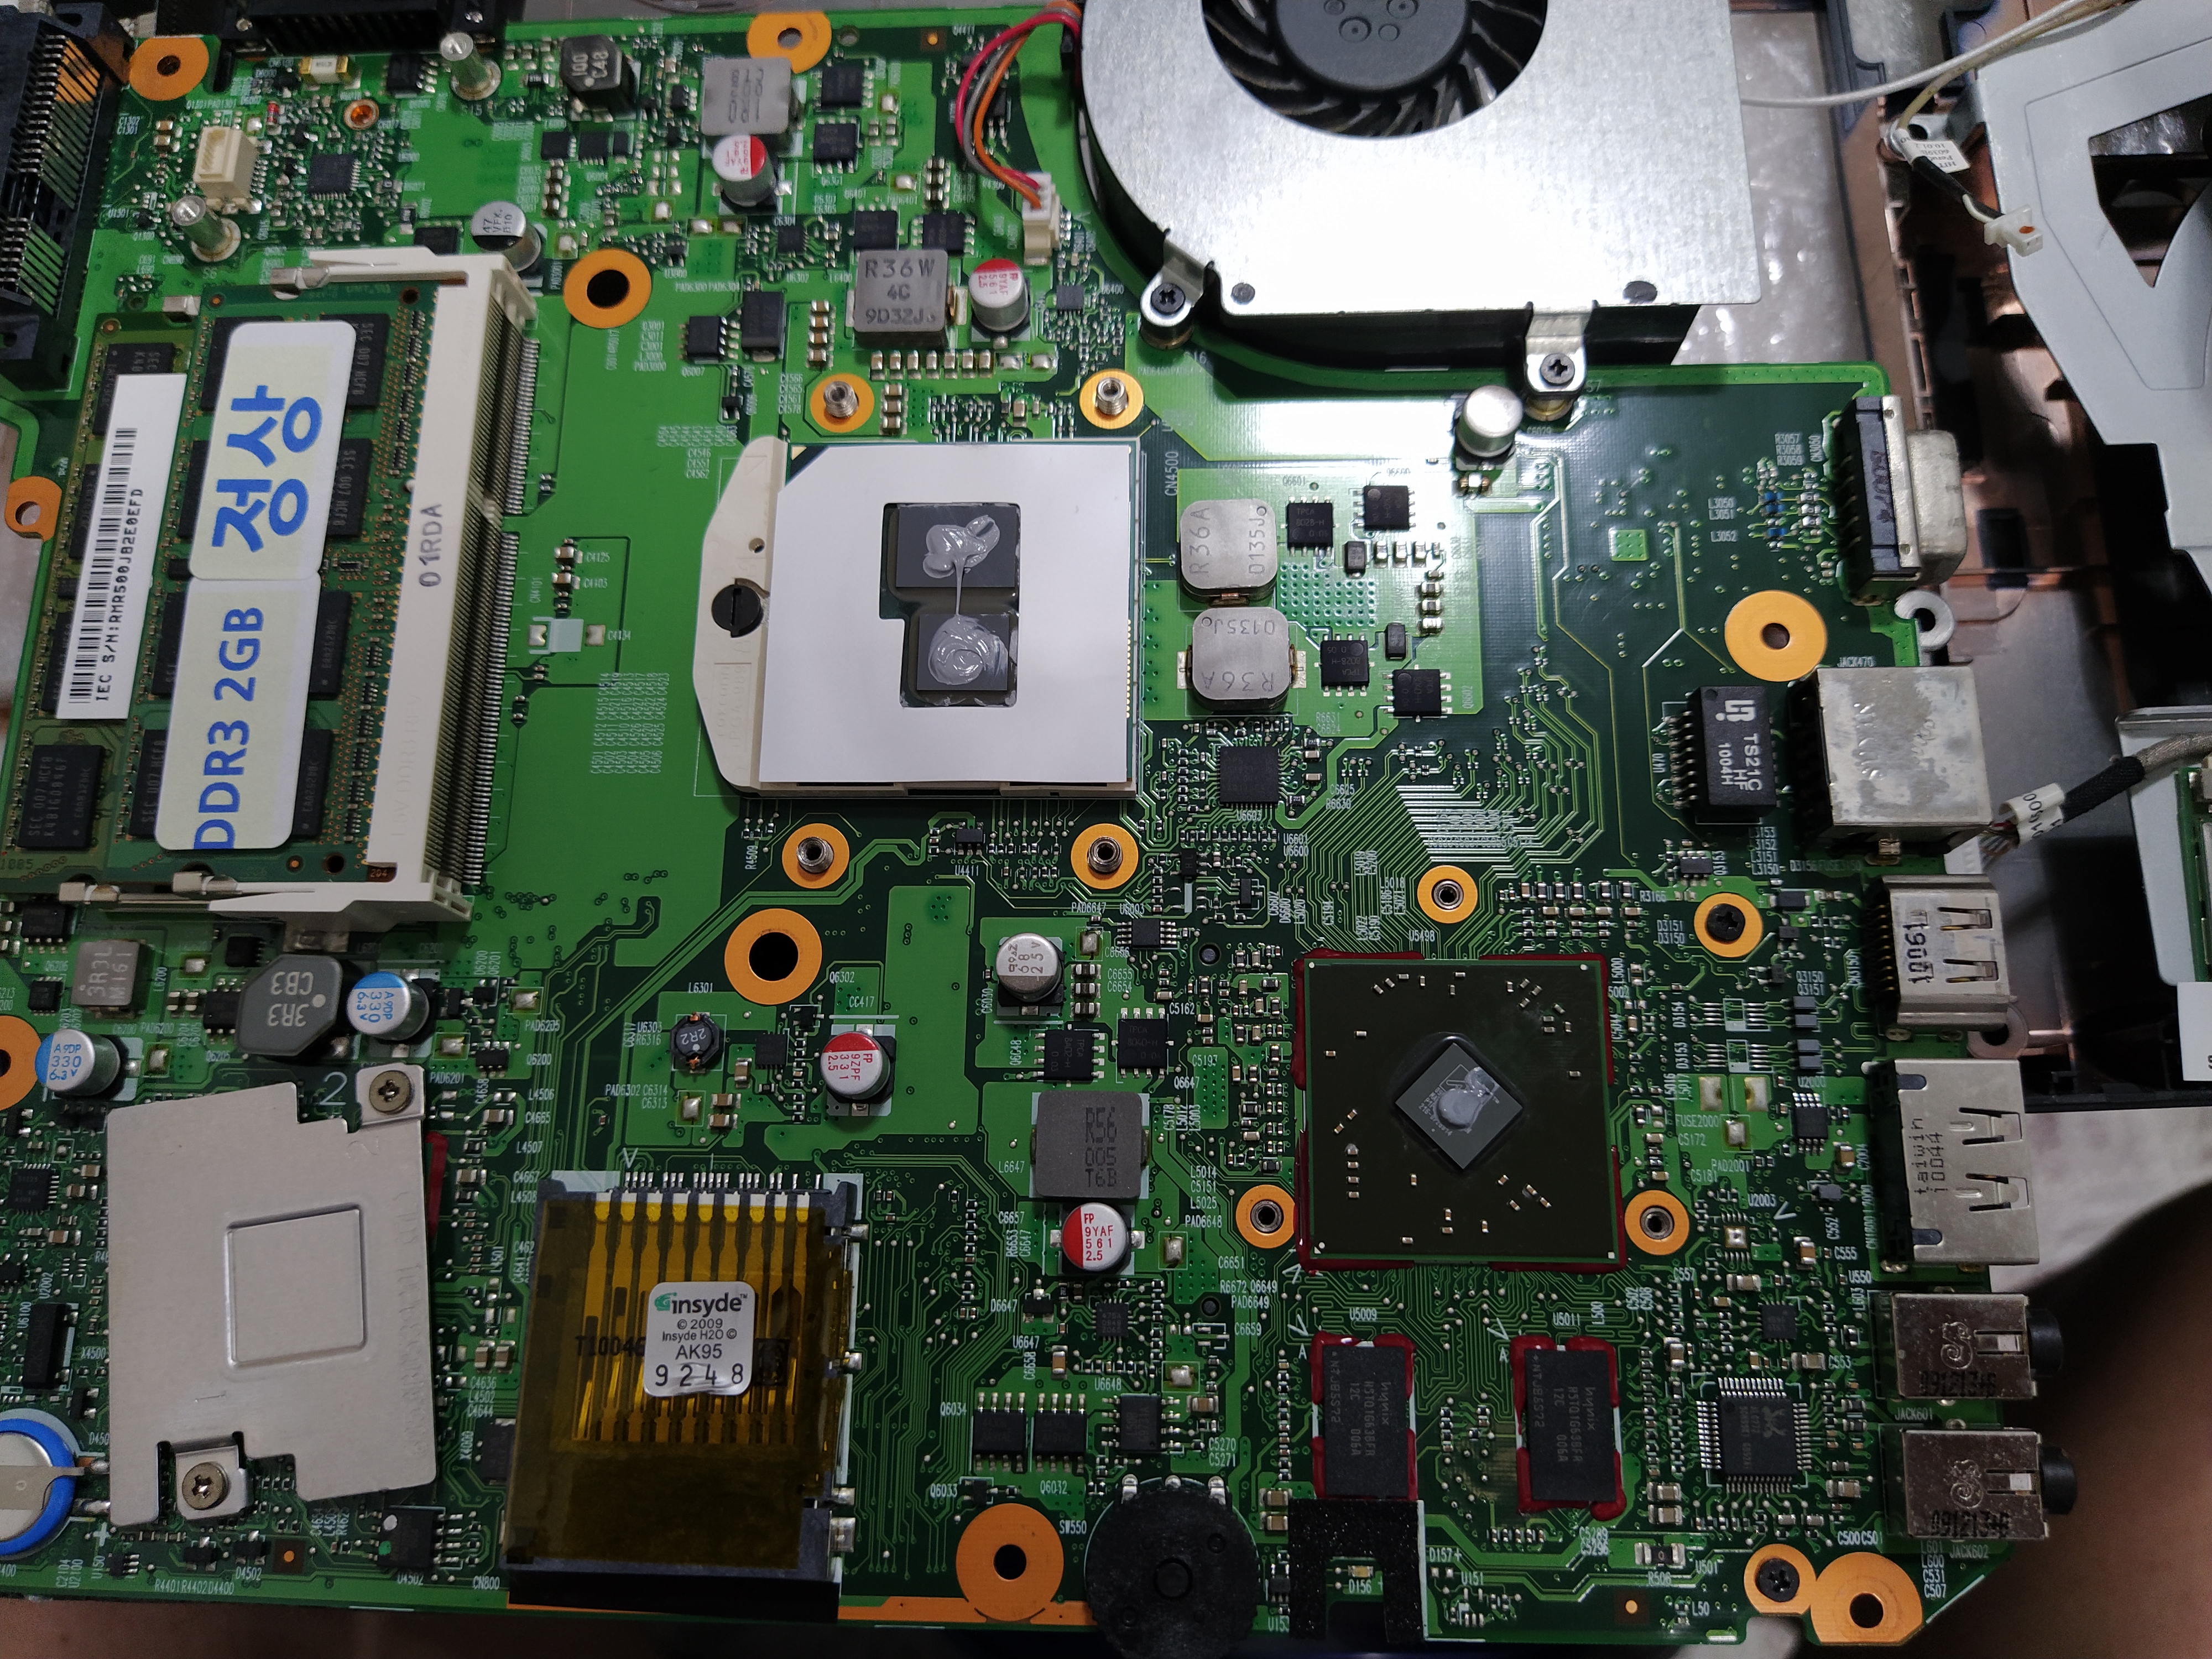
드디어 메인보드를 분해할 수 있습니다. 아래와 같이 생겼고요. 볼륨 조절하는 부분이랑 측면 포트가 케이스랑 걸려서 잘 안 빠질 수 있으니 파손되지 않도록 조심스럽게 분해하면 됩니다.

10년 동안 굳어버린 서멀구리스를 제거하고 새로운 서멀 컴파운드로 재도포 작업을 진행합니다.

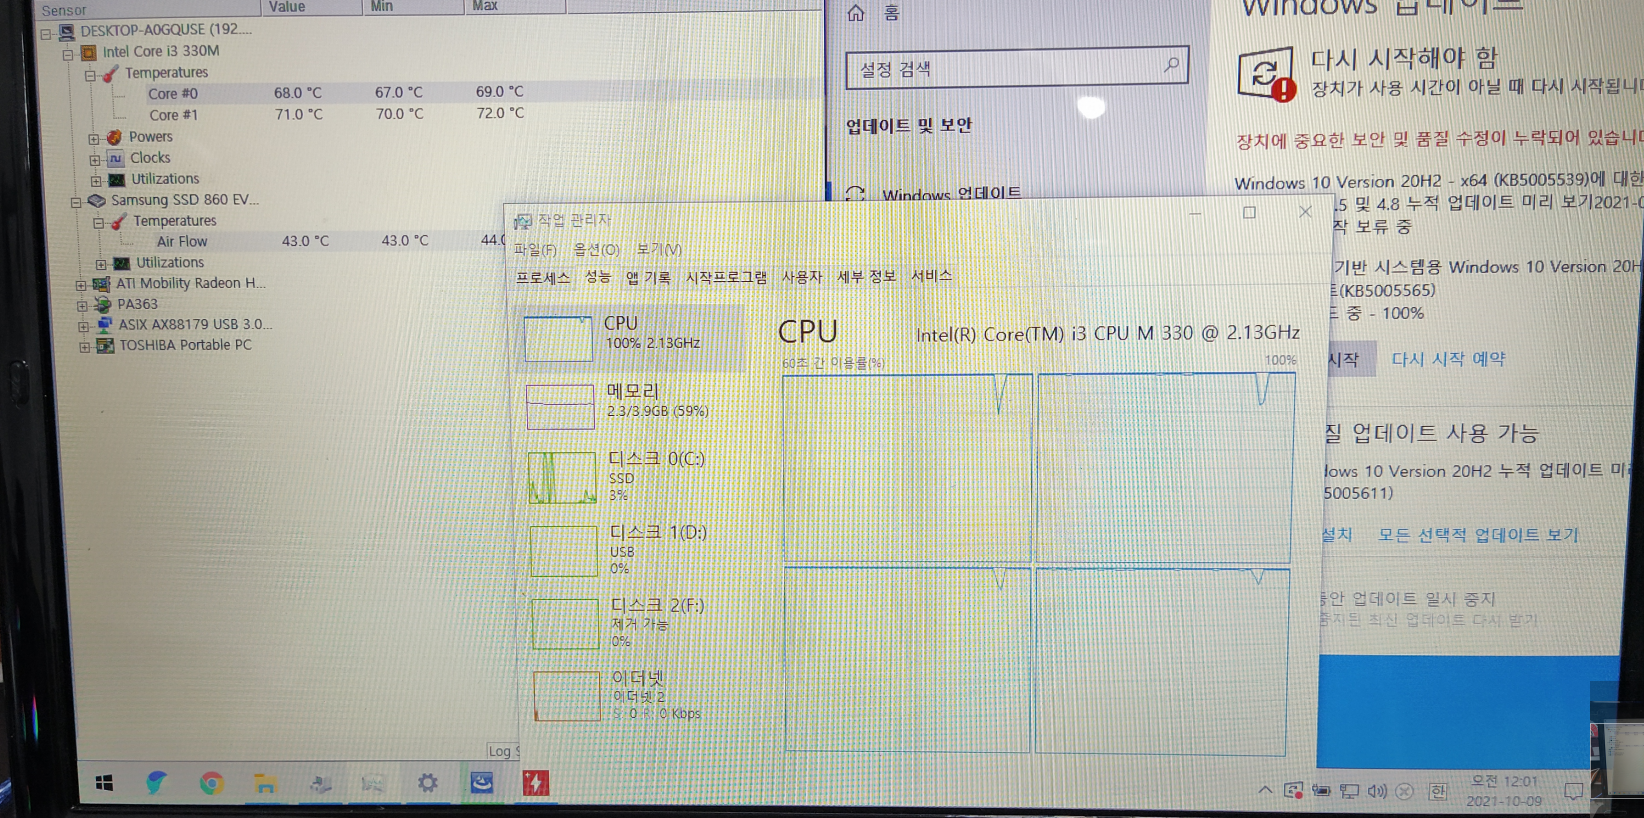
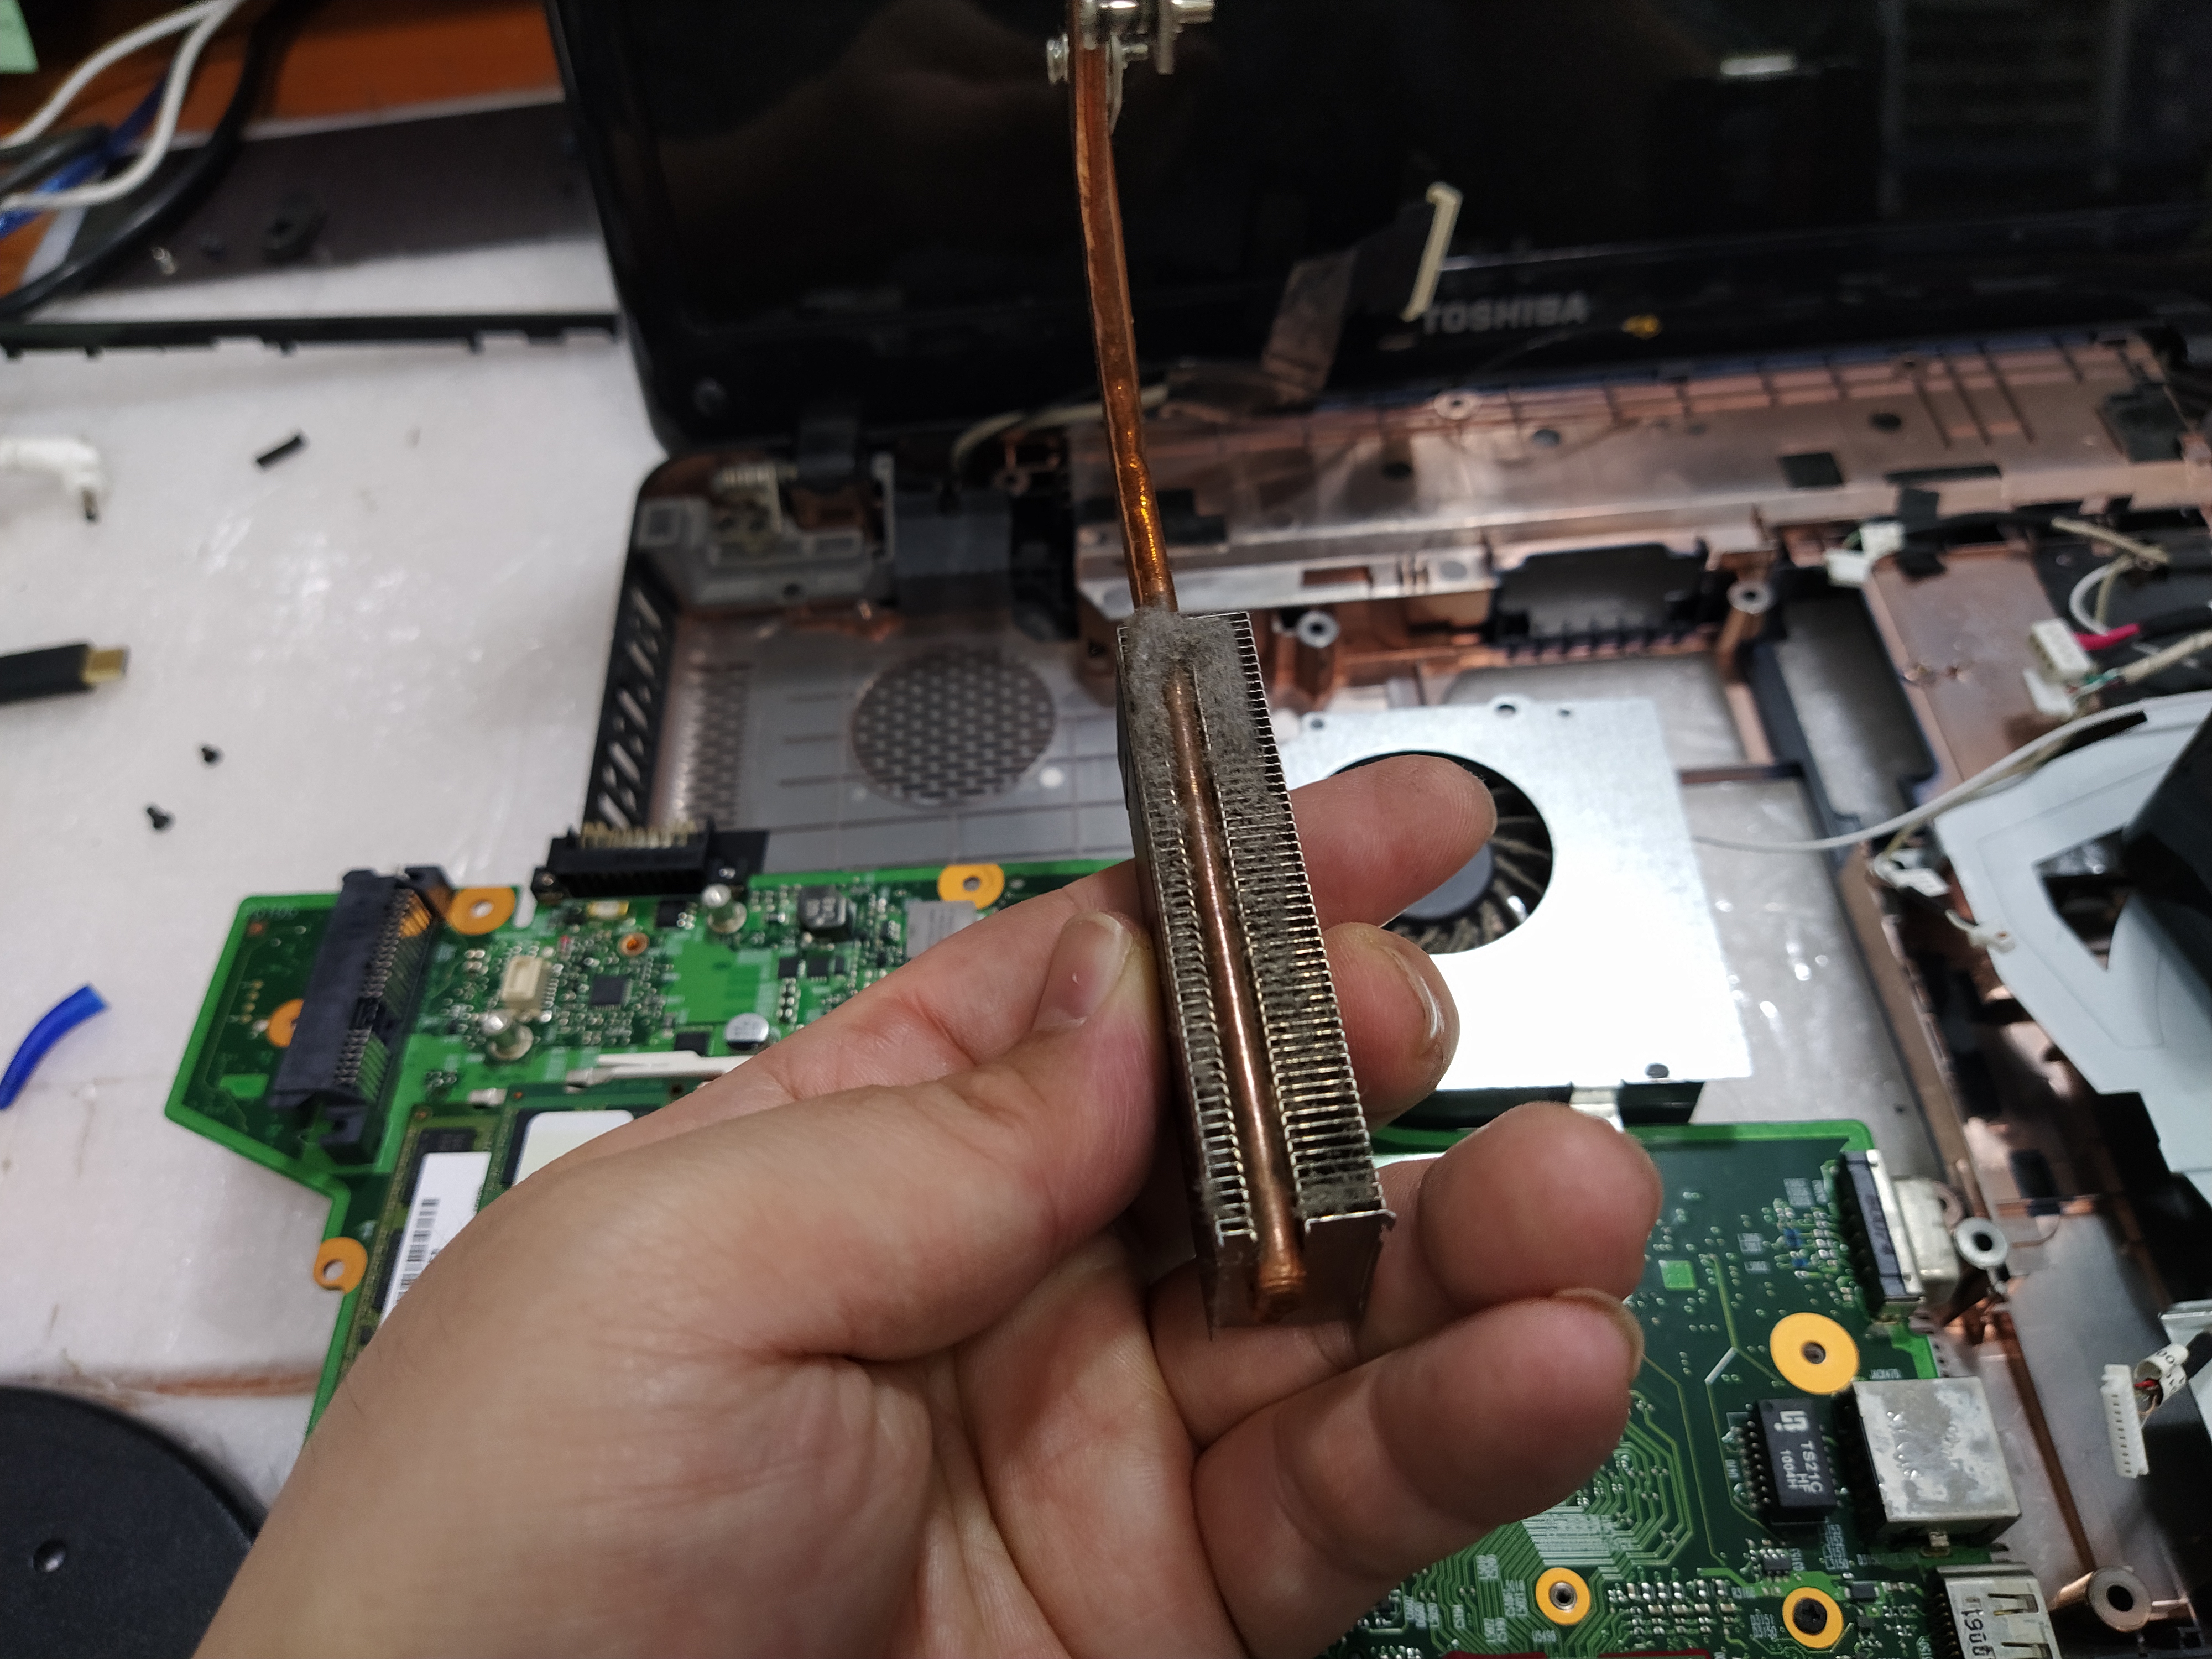
| CPU 방열판에 묻은 먼지입니다. 사실은 분해하기 전에 컴프레샤로 살짝 불어봤는데요. 먼지가 많이 날아가진 않았네요. 팬을 고정하진 않고 컴프레샤로 청소한 것이라서 온힘껏 불지는 않고 외부에서 바람을 넣어주는 정도만 쏴줬습니다. 이 노트북 분해하기가 쉽지 않은 모델이라서 노트북 청소-서멀컴파운드 재도포 비용이 처음에 윈도우 재설치 수리 견적으로 넣었던 비용보다 더 많이 발생하는데 이렇게 연식이 오래된 노트북에 수리 비용을 그렇게 많이 사용하면, 차라리 새로 구입하는 게 나아서 손님한테는 추가 비용을 받지 못하고 추가 작업을 진행해야하니 수고로움이 덜한 컴프레샤로 해결해보려고 했는데 열이 안 떨어지네요. 윈도우10 재설치 비용도 요즘 출시되는 노트북보다 추가 비용을 청구했습니다. 수리 시간도 하루 걸린다고 말씀드렸습니다. 구형 CPU 노트북 + 메모리2기가, 하드디스크 320기가 = 당일 작업하기는 어렵습니다. => 그만큼 작업 시간이 오래걸립니다. 점검해봐야할 부분도 많습니다. 신형 컴퓨터에 없는 호환성 오류도 많이 생기고요. 윈도우10 설치는 했지만, 너무 느려서 결국 메모리도 2기가 추가해서 4기가로 맞춰서 출고했습니다.) 청소하기 전에는 CPU 온도가 90도 넘어가면서 윈도우10하는 과정에서 컴퓨터가 꺼졌는데요. 이렇게 청소한 다음, 서멀컴파운드 재도포하니 60~70도까지 떨어지고 꺼지진 않습니다. 하지만, 오래 사용하기는 힘듭니다. 윈도우 업데이트 작업 중 CPU 이용률이 100%를 계속 찍고 있네요. i3 M330 (2.13GHz) |
 |
MX-4 서멀구리스 재도포하고
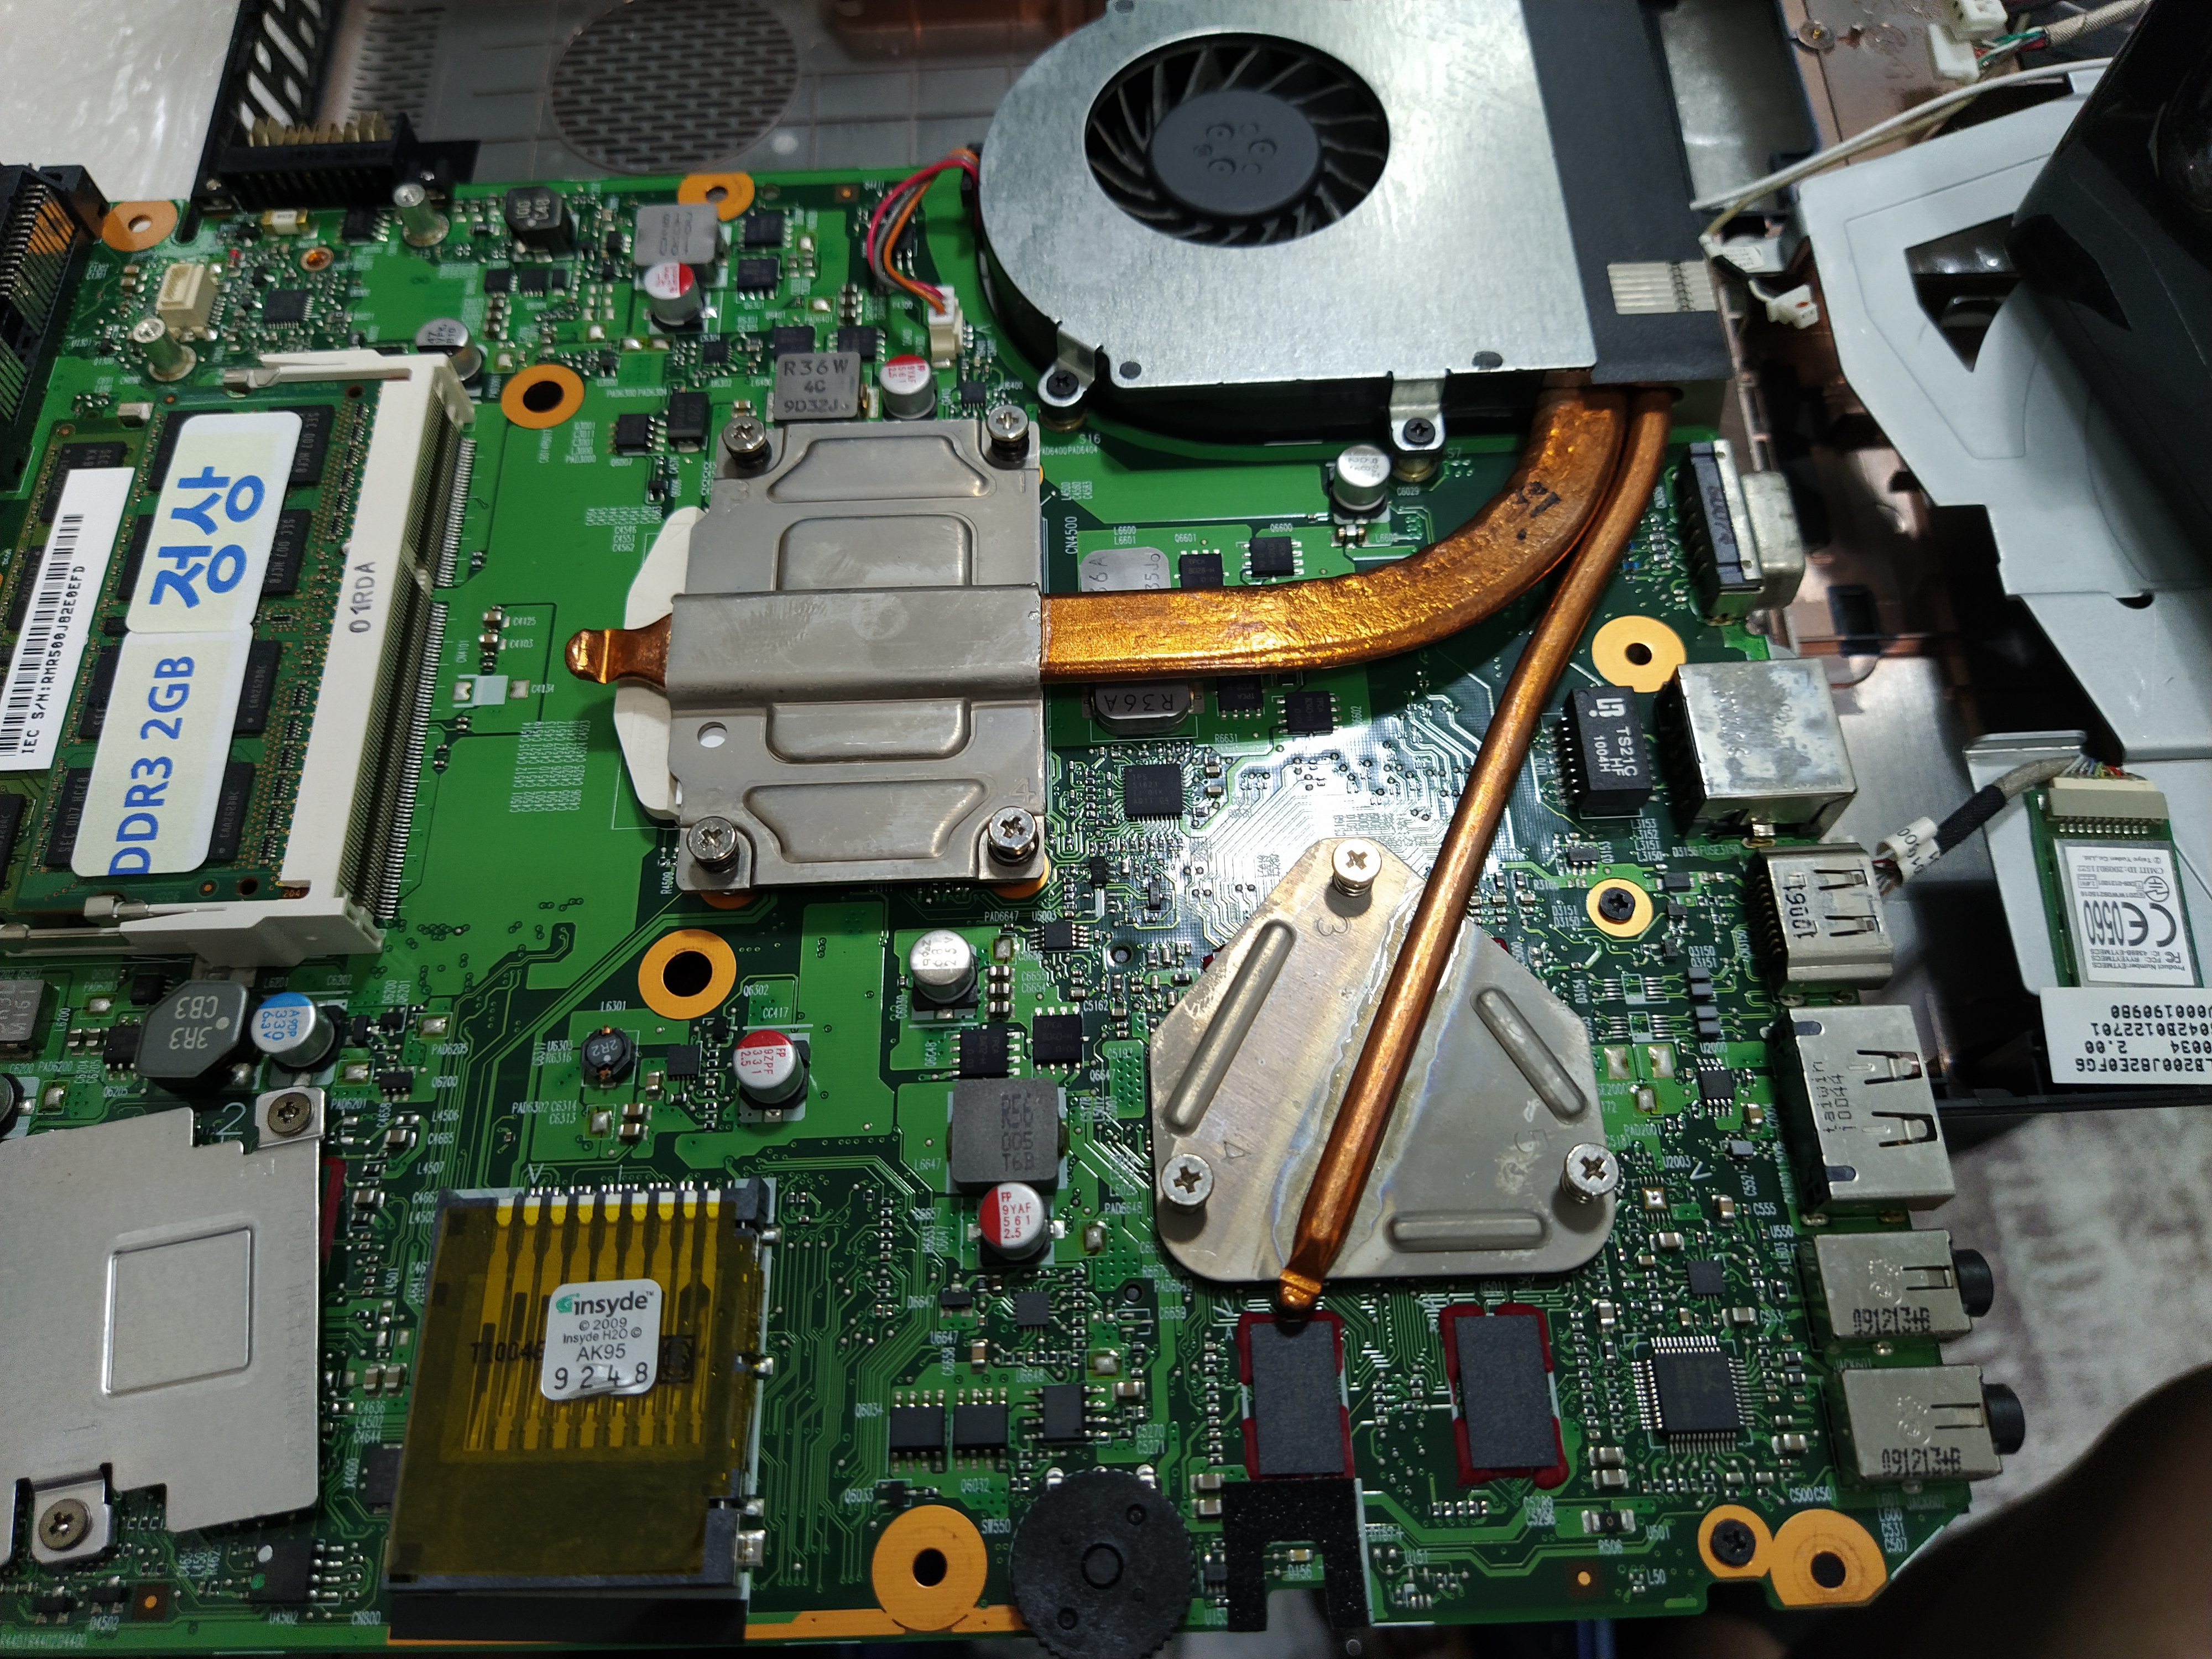
CPU, 그래픽 칩셋 방열판을 재조립했습니다.
그리고 마지막으로 분리했었던 커넥터를 재조립하는 과정입니다.
노트북 시모스 모드에서 Internal Pointing Device를 Disabled 시켜놓은 것도 모르고, 재조립 후에 터치패드가 동작을 안 해서 키보드를 분해하고 터치패드 케이블을 몇 번 재장착을 해봤네요. (터치패드 동작되면 커서가 마음대로 움직이니깐 손님께서 꺼놓은 거 같습니다.)

[ 도시바 노트북 분해 관련 글 ]
도시바 노트북 L510 PSLQ0K-01 1005 https://blog.daum.net/dongtancom/60
도시바 L510 노트북 분해후 서멀그리스 재도포
도시바 L510 노트북 분해후 서멀그리스 재도포 작업중입니다. 분해팁은 키보드 위에 있는 캡을 제거하고 나사풀면 키보드 제거가 가능합니다. CPU 고정나사가 독특하네요. 나사 2개를 풀고 걸쇠를
blog.daum.net
도시바 노트북 C50-A PSCFJK-003004 https://dongtancom.com/entry/도시바노트북수리-SSD-메모리-업그레이드-작업
도시바노트북수리 (SSD, 메모리 업그레이드 작업)
처음 입고된 상태입니다. 부팅이 안되고 있습니다. No bootable device -- Please restart system 도시바 노트북은 한국어 지원 홈페이지도 없어진 걸로 알고 있습니다. 더 이상은 도시바 노트북을 보기가 힘
dongtancom.com
도시바 노트북 모델명 : P55W-C5314
https://post.naver.com/viewer/postView.nhn?volumeNo=27512036&memberNo=1266136
동탄1신도시에서 오신 고객님, 도시바노트북에 SSD를 장착했습니다.
[BY 동탄컴퓨터수리점] 동탄1신도시에 방문해주신 고객님의 도시바 노트북입니다. P55W-C5314 SSD 업그...
m.post.naver.com
It's an old Toshiba laptop. Now it's not easy to see the Toshiba laptop. Following semiconductors, the PC business was withdrawn, and the Toshiba PC division sold it with Sharp. Toshiba laptops in Korea seem to have only old ones left. Most laptops are at least 5 to 10 years old.
As older laptops tend to purchase new laptops rather than repair and reuse them, it has become more common to see older models as below. Sometimes, people ask if they can bring old laptops (unused laptops) from the warehouse and recycle them for children's learning (online education).
If you set the memory to 4 gigabytes and install an SSD, you can use it, but it's very slow, so I don't recommend it. The money spent on repairs and upgrades is less effective. In my personal opinion, I carefully suggest that it would be better to purchase new work tools, learning tools, and work tools even if they are a little expensive. I don't recommend a low-cost laptop equipped with a celloron or pantry low-end CPU.
I think it would be better to use laptops with high-performance CPUs such as Intel i3, i5 (10th generation, 11th generation), Ryzen 3rd generation, and Ryzen 5th generation. Overseas corporate products (renovo, HP, etc.) are often cheaper than domestic conglomerates such as Samsung and LG at special prices. Below is a picture of the disassemble process of Toshiba Satlite L510 (Detailed Model Name: PSLGWK-006005).
Toshiba Satlite PSLGWK-006005 Sometimes older laptops have screws hidden in laptop anti-slip pads. This model had no hidden screws. However, it is a unique model with a screw on the back of the laptop hinge. See the picture below, it is a model that can be disassembled only by unscrewing the back of the laptop. (CAUTION) => Remove the keyboard and remove the hidden screw to completely disassemble it. The method of disassembling the keyboard continues from the picture below.
Refer to the position of the screw for disassembling the laptop. I removed the screws on the back and collected them well in one place. Please note that we have classified and collected similar to the screw position of the laptop. The thickness and length of the screw are also different, so you need to know the location and store it well so that it does not fasten incorrectly. Old laptops mostly have hidden screws.
If you don't loosen this screw, you can't peel off the cover, so if the cover doesn't come off well, there may be hidden screws, so don't peel it off with force and loosen the hidden screws. If you remove the laptop's keyboard as below, you can find hidden screws. To remove the screw on the keyboard, remove the cover on the keyboard screw first. (You can remove the cover and dismantle the keyboard by using a straight driver or flat iron plate Hera.)
Remove the plastic bar on the keyboard screw to remove the keyboard. (It's hard to understand why it's so complicated.) I found the screw hidden under the keyboard as below. The lower plate and the keyboard plate are separated by loosening this screw. Also, as you can see, it is a laptop that has a lot of connectors connected, so all of these connectors need to be released to be decomposed.
I think it would be better to take a picture in advance and proceed with the work. If you forget later, you may have to dismantle and connect again. Not connecting will not break down, but it's a pretty cumbersome task, so it's a good idea to leave a picture to check in advance. If it's your first time breaking it down, leaving a record in the practice book can also be a notebook breaking practice.
These days, there are not many models with this many connectors. Some HP laptops are difficult to break down. I found the hidden screw. If you remove the keyboard connector, remove the mouse touchpad connector, and remove the special key connector on the keyboard, the keyboard top will be separated as shown below. The main board must be separated from the bottom plate for CPU thermal grease re-application work.
Since many connectors need to be removed and then disassembled as shown below, if you record them in advance and disassemble them, it will be easier to reassemble. (I don't remember everything because I'm not writing a post right after I break it down, but just looking at the picture and writing again.) It is important to remember the location of the connector that was disassembled when you actually open it because we are explaining the related image as shown in the picture.
If you're disassembling, please focus on disassembling them. Indication of the attraction of numerous connectors (may not be 100% marked because it was viewed and checked in the picture) In order to completely disassemble the main board from the lower plate, you need to loosen the screw fastened to the lower plate. Not many screws were fastened. I remember unscrewing about two places. There's a screw on the top of the CPU fan. I think a screw was fastened to the main board.
If the person who actually disassembles raises the main board slightly with his finger, there will be a catch. It can be considered that there are screws or clogs in that part. (Refer to the picture below) When you lift the board with your finger, slightly! I lift it up as if I'm checking where it's stuck, but if I lift it with my lever too much, it can break.) Check and loosen the tightened screw to disassemble the main board. Finally, you can break down the main board.
It looks like this. The volume control part and the side port may not come out well because of the case, so be careful not to break it down. The disassembled main board. Remove the hardened thermal copper for 10 years and re-apply it with a new thermal compound. Dust on the CPU heat sink.
Actually, I blew it slightly with a compressor before disassembling it. There's not a lot of dust. It was cleaned with a compressor without fixing the pan, so I didn't blow it all the way, but just shot it to put air in from the outside. It's not an easy model to break down, so the cost of cleaning and re-applying the laptop is higher than the initial estimate for window reinstallation, and if you use that much repair cost on an old laptop, it's better to buy a new one, so I tried to solve it with a less laborious compressor.
The cost of reinstalling Windows 10 was also charged more than the laptops released today. I told you that the repair time takes a day. Old CPU laptops + 2 gigabytes of memory and 320 gigabytes of hard disk = It's hard to work on the same day. => It takes that long to work. There are many things to check. There are many compatibility errors that are not found in the new computer. I installed Windows 10, but it was too slow, so I added 2 gigabytes of memory and released it in time for 4 gigabytes.)
Before cleaning, the CPU temperature exceeded 90 degrees and the computer turned off during Windows 10. After cleaning like this, when the thermal compound is applied again, it drops to 60 degrees and does not turn off. However, it is difficult to use for a long time. When I blew it slightly with the compressor, some of the dust came off and some of it remained on the top. Apply MX-4 thermal grease again.
MX4 thermal compound has been re-applied. CPU and graphic chipset heat sink have been reassembled. The cleaned heat sink was reassembled and the laptop was reassembled. And it's the process of reassembling the connector that was finally disconnected. This is the process of reassembling so that there is no missing connector.
'▶ 컴퓨터수리' 카테고리의 다른 글
| HP Pavilion 15-cc5xx (15-cc518tu) SSD 교체 작업 및 호환 제품 (0) | 2021.11.10 |
|---|---|
| (다음, daum) 이 사이트는 안전하지 않습니다. (0) | 2021.11.05 |
| 사용중에 무선이 끊어지는 노트북이 입고됐습니다. (무선랜카드 불량건) (0) | 2021.10.26 |
| 컴퓨터 후면팬 고장 수리 2건 및 그래픽카드 청소 및 서멀구리스 재도포 (0) | 2021.10.15 |
| 컴퓨터 팬 소음 원인 찾아서 해결하는 방법 (0) | 2021.10.11 |
| 기가바이트 노트북 업그레이드 (P17) C드라이브 용량이 가득 찼어요! (0) | 2021.10.04 |
| 2021년 09월 15일 윈도우 업데이트 (KB5005565) (0) | 2021.09.16 |
| 안켜지고 켜지다가 꺼짐 그리고 윈도우10 로딩화면에서 안넘어감 "총 3가지 불량 증상"있는 컴퓨터 (0) | 2021.09.05 |
| 다크플래쉬 DLX21(DLM21) RGB 케이스 팬 전원 연결하는 방법 (0) | 2021.09.03 |
| A1418 맥 지우고 윈도우10 설치 (느림) (0) | 2021.08.28 |


댓글